No-Knead Honey Oat Bread
This simple No-Knead Honey Oat Bread recipe is mostly hands-off and delivers delicious, flavourful results. A hearty, same-day breakfast loaf that’s perfect as is simply toasted with salted butter.
Ingredients
- 1½ cups water, room temperature at or near 70°F/21°C
- 1/4 cup honey
- 2 tablespoons extra-virgin olive oil (sub grapeseed, avocado or any neutral vegetable oil)
- 2½ teaspoons active dry yeast
- 3 cups bread or all-purpose flour + 1 tablespoon, divided
- 1 cup old-fashioned rolled oats
- 1½ teaspoons kosher or fine sea salt
- ½ teaspoon ground cinnamon
- Butter or non-stick spray for greasing the pan
Instructions
- Whisk together honey, oil and water until the honey has dissolved, then sprinkle active dry yeast across the top. Let sit for 10-15 minutes.
- In a large mixing bowl, whisk together flour, oats, salt and cinnamon and let sit for 10 minutes.
- Pour in the yeast mixture and mix everything together. Cover and let rise until the dough has doubled in volume, about 2 hours. It will be very sticky and well-hydrated. If you don’t intend to bake it right away, at this point you can place the bowl in the refrigerator, covered tightly with plastic wrap, where it will keep for up to 3 days.
- Once you’re ready to bake, butter a 9x5-inch loaf pan. Sprinkle 1 tablespoon flour across the top of the dough. Using your hand or a dough scraper, scrape the dough away from the sides of the bowl, turning the bowl with your left hand until the dough begins to take the shape of a loaf. Lift the dough out of the bowl, turn it over and place it smooth side down onto a lightly floured surface, taking care not to completely deflate it. Flour your hands again and take one end and lift and fold 1/3 of the dough into the centre as if you were folding a letter. Repeat with the other end, then turn and place loaf seam side down. Nudge the dough into the shape of a loaf then place it into the buttered loaf pan. Set aside to let rise again, uncovered, for 1 hour or until it has risen just above the edges of the loaf pan.
- Position a rack to the centre of the oven and preheat to 350ºF (177ºC). Bake for 50 minutes until the top is a rich, golden-brown colour and it sounds hollow when you tap on the top. Turn loaf out onto a wire cooling rack and let cool for 1 hour before slicing to allow the cooking process to complete.
Notes
Flour: For the best texture and structure, I always use unbleached, minimally processed bread flours when I bake. You can combine either finely ground 100% whole wheat or whole wheat all-purpose flour together with the bread or all-purpose flour in this recipe. All will still produce a delicious, yet softer and less chewy loaf. You can also substitute up to 30% whole grain flour for a nuttier taste and added nutritional value, without making any further adjustments.
Oats: Whole oats are best, they’re thicker and retain their shape better during baking, giving you that perfect, chewy texture. You can also use quick oats if that is what you have on hand. Because they have a finer texture, the consistency of the bread may be slightly different.
The quantity of salt you use will vary depending on type and brand. Diamond Crystal kosher salt is my go-to for anything baked or cooked. If using Morton’s kosher salt, which has a coarser texture, or table salt, reduce by half.
Fresh yeast is key. Once opened, active dry yeast should be kept in an airtight container in the fridge. For best results, measure it out then let it sit at room temperature for 20 minutes before baking.
Texture: This is a high-hydration dough. It will be heavy, wet and sticky and will stick to your hands and to the sides of the bowl. Rest assured, it will quickly begin to hold together once you start shaping it, and will result in a soft, springy loaf once baked.
Make it gluten free: Replace the bread or all-purpose flour with a 1:1 gluten-free bread flour blend and use gluten-free oats. You may need to experiment with different flour ratios to achieve your desired texture.
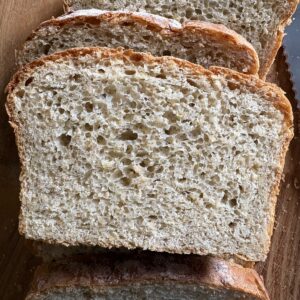
Baked in a 9×5-inch loaf pan at low heat until the crust is a rich, golden-brown colour, this recipe will produce a loaf that can be sliced into uniform, good-sized slices ideal for toasting and sandwiches.
Storage: Bread will keep well sealed in an airtight bag or container on the counter for 3-4 days or in the fridge for up to a week. Sliced bread will freeze well in an airtight container or freezer bag for several months.