Last updated on May 23rd, 2026
This simple, overnight 4-Ingredient Artisan Pizza Dough is the best homemade pizza dough for the home oven. Perfect for any toppings, you can even use this recipe to make same-day pizza dough.
Homemade pizza truly has my heart. It’s always our first choice for Saturday night dinners, and once you’ve perfected your own crust there really is no going back.
This is my take on hand-mixed, restaurant-quality pizza dough that you can bake in your own oven. Like my artisan bread recipes, it’s a no-knead, high hydration dough made with just 4 key ingredients – flour, water, active dry yeast and kosher or fine sea salt. It’s super easy to handle – you’ll have no trouble stretching it – and results in a perfectly light and chewy crust with a tall rise every time.
Here’s everything you’ll need to make it
- 2 cups (260 grams) high-quality all-purpose flour, preferably 00 pizza flour, plus more for dusting
- 1 teaspoon (3 grams) kosher or fine sea salt
- 1 cup (240 grams) water, room temperature (at or near 70°F/21°C)
- ⅛ teaspoon (0.5 gram) active dry yeast
- Extra-virgin olive oil for brushing
Why you’ll love this 4-Ingredient Artisan Pizza Dough recipe
The key to perfect pizza dough is the slow, overnight fermentation to build strong, almost-sourdough-like flavour. Then, the high oven temperature adds a touch of smokiness while using a baking steel or pizza stone produces those much sought after, blistered bubbles and charred, crispy bottoms.
Tips for making the best pizza dough
If you don’t have 00 pizza flour you can use any bread or all-purpose flour which will give you a slightly thicker, chewier crust. To make a whole wheat pizza, sub 1/3 whole wheat flour for a balanced dough that goes well with hearty toppings like artichokes, kale, sardines and more.
Unlike many dough recipes, this recipe does not include any oil resulting in a crisper, more airy crust. Only a very small amount of oil is used for brushing to prevent sticking and a skin from forming while proofing.
Like my artisan bread recipes, this is a wet, high-hydration dough. Most pizza dough recipes come in at somewhere between 65 and 70-75% hydration where 75% is considered high. I prefer the fuller taste and complex structure of higher hydration doughs. The key when handling it is to add bits of flour as needed to keep it from sticking to the proofing vessel, the shaping surface and your hands. NOTE: This does not apply when performing your folds, for which I recommend wetting your hands with lukewarm water and even repeating this step 2-3 times if necessary. The fold sets, extended fermentation and cold proof before baking will all work to strengthen your dough. And unlike bread doughs, flour is your friend here and should be used liberally. Lastly, using parchment to transfer your pizza(s) into the oven will counter any residual stickiness should you have any difficulty.
Folding the dough during bulk fermentation: Stretching and folding the dough followed by a set of coil folds (both of which are described below) will produce tension and layers that will enhance both gluten development and structure and make the dough easier to work with. For this higher hydration dough, 2 easy sets of stretch-and-folds and 4 to 6 simple coil folds will be enough to develop the gluten and result in an even dough with optimal structure to get that crispy, airy crust we crave.
How to perform stretch and folds: Stretching and folding creates 4 new layers in the dough with each set. I like to use this process first, early in the bulk fermentation stage. To perform the stretch and fold, wet your hand and pick up one end of the dough. Stretch it then fold it back over the top, gently pressing it down into the centre with your fingers. Turn the proofing container 90 degrees and repeat 3 more times until each side of the dough has been stretched and folded, with the seam facing up.
How to perform coil folds: Coil folding is a gentler method of handling the dough and focuses more on the fold than the stretch. It helps prevent over-stretching and over-working what is now a partially fermented dough and produces a more even distribution of tension and gases without risking degassing. Similar to a stretch and fold, coil folds should be performed on the dough without removing it from its proofing container. To perform a coil fold, pick up the dough from the middle with both hands and lift, allowing it to stretch until one end releases from the proofing container. Then lower the dough to tuck the loose end under the middle and repeat this process for the other end. Rotate the container 90 degrees and repeat the process until the dough holds its shape (from 4 to 6 times).
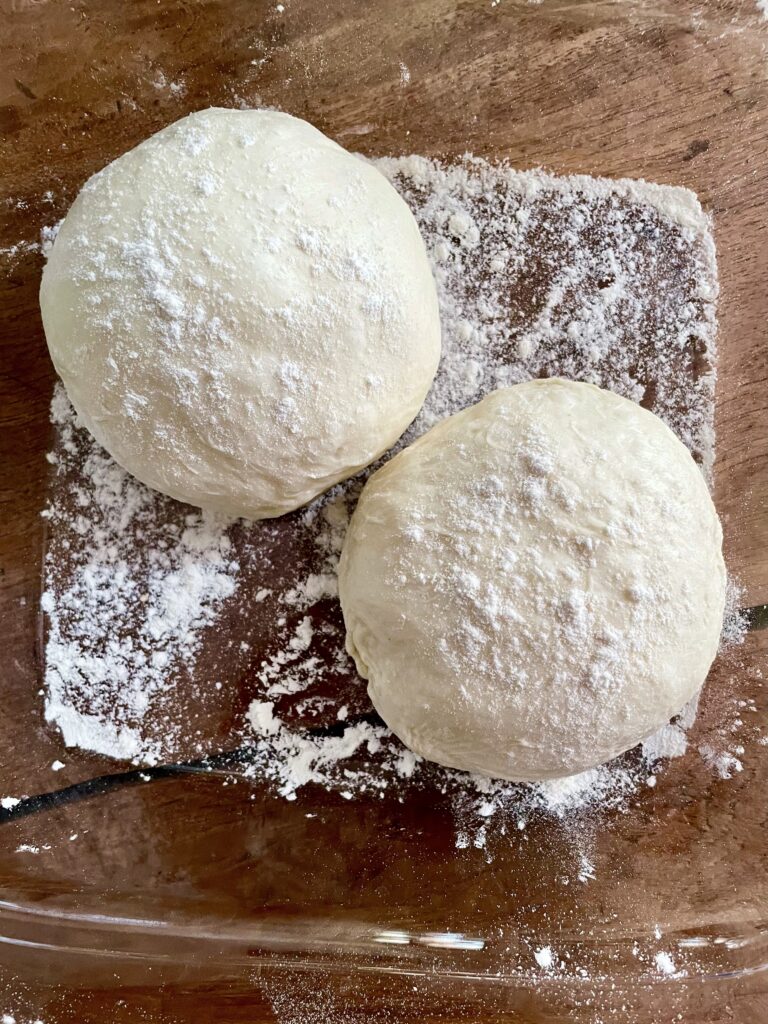
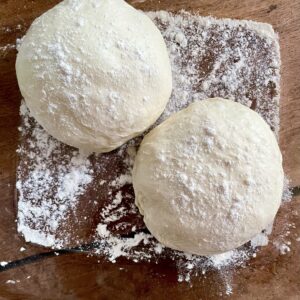
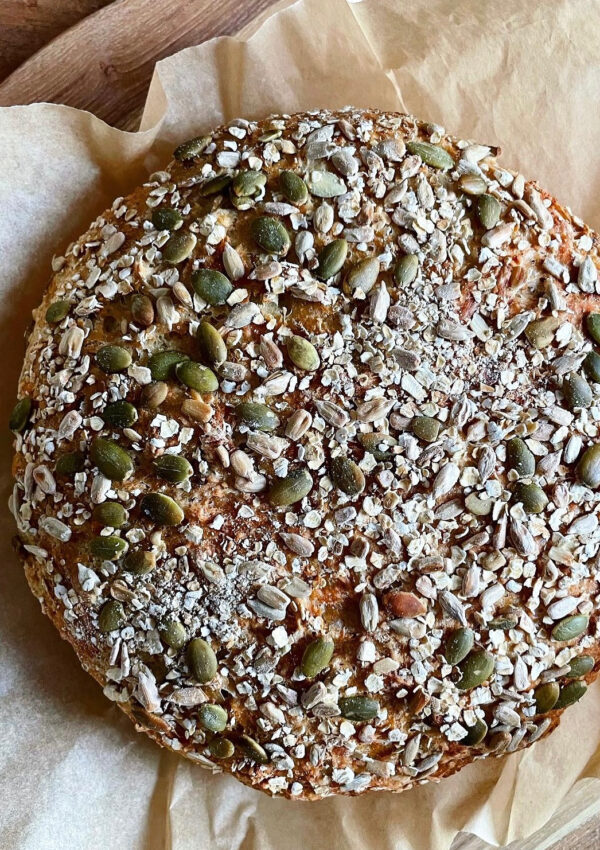
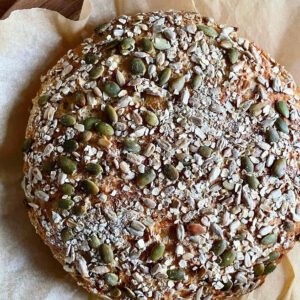
Cinching (Shaping the dough onto balls like in the image above): A technique most often used to shape lower hydration bread doughs, I find cinching to be a quick and easy method that’s ideal for forming pizza dough balls during the pre-shaping phase. It is the last step prior to baking that allows you to manually incorporate more strength into the dough. To perform this step, fold the top two corners of the dough to the middle, then carefully roll the dough from the top to bottom, creating a log shape with the seam side on the bottom. Place the ball of dough in the palm of your hand and gently turn it, pinching the ends under as you go, 4 or 5 times until there is no seam left. At this point your dough ball will be soft and smooth to the touch, and you should be able to see good bubble formation just beneath the surface (see image above).
The longer the fermentation, the richer flavour: This recipe is flexible enough to produce a same day pizza, even though I think the overnight rise time results in a more flavourful dough with a bubblier texture that is easier to stretch and shape.
To bake it on a sheet pan: Spread dough onto pan, top with tomato sauce then pre-bake at 450ºF/230ºC for 10 minutes. Remove from oven and place on heat-safe cooling rack. Top with cheese and any additional toppings, then return to oven and bake for an additional 10-12 minutes until done.
Freeze half the dough for a future pizza night: Pizza dough can be frozen once shaped into balls then stored for up to 3 months. Simply place dough into an airtight container or well-sealed freezer bag. When ready to bake, transfer frozen dough from freezer to refrigerator to thaw for 1 day or at room temperature for 4 to 8 hours. Remove dough from plastic, cover and let proof as below until soft and puffy to the touch.
Baking schedule
Making this Artisan Pizza Dough is a two-day process where the dough is mixed and prepared on day one, left to rise overnight, then baked on day two.
This is what it looks like:
Friday morning, afternoon or early evening
- Mix dough, perform one set of stretch and folds, cover and let rise for 1 hour.
- Perform a second set of stretch and folds and let sit for 1 hour more.
- Perform one set of coil folds, brush the surface with oil, cover and let rise overnight.
Saturday morning
- Divide and shape dough into 2 or 3 equally sized portions. Cover and let rise for 5-6 hours or until you’re ready to bake.
Saturday evening
- While the oven is pre-heating, chill the dough for 30 minutes and assemble your toppings.
- Shape your crust, add toppings and bake!
To make same-day pizza dough:
- Mix at 8 am and let rise for 1 hour.
- Perform one set of stretch and folds.
- Cover and let rise for 8 hours.
- At 5 pm, shape dough into balls, cover and refrigerate for 1 hour.
- Assemble pizza after 6 pm (or any time over the next 3 days) and bake!

This 4-Ingredient Artisan Pizza Dough can be kept in the refrigerator for up to 3 days, which pretty much makes homemade pizza a 20-minute meal that you can easily throw together on a busy weeknight. Try it with this No-Cook Tomato (Pizza) Sauce or this Quick Homemade Tomato Sauce!
Try these Easy Small Batch Ciabatta Rolls or this Simple Focaccia Bread next.
If you make this recipe, please tag me on Pinterest or Instagram so I can see!
And of course, feel free to leave any questions, comments or reviews. This is the best place to reach me, and I’d love to hear from you!
4-Ingredient Artisan Pizza Dough
Ingredients
- 2 cups high-quality all-purpose flour, preferably 00 pizza flour, plus more for dusting
- 1 teaspoon kosher or fine sea salt
- 1 cup water, room temperature (at or near 70°F/21°C)
- ⅛ teaspoon active dry yeast
- Extra-virgin olive oil for brushing
Instructions
- Gently stir yeast into warm water and let stand for 10-15 minutes.
- Measure flour and salt into a medium-sized bowl, stir together and let sit for 10 minutes.
- Pour yeast and water mixture into flour and mix with a rubber spatula just until combined. Set spatula aside and begin to mix by hand, wetting your hand before mixing to prevent sticking. As you mix, reach underneath the dough and pull ¼ of it up and stretch it out and back over the top of the dough to the other side. Turn the dough and repeat 3 or more times until a ball has formed. At this point the dough will be sticky. Sprinkle flour over the dough and cover with a dry tea towel to let rise for 1 hour or until it has grown to about 30% larger and is puffy and smooth.
- Uncover dough and, with wet hands, pull one side of the dough out from the centre and stretch and fold it back over the remaining dough, gently pressing the edges downward to seal the edge. Turn bowl 90 degrees and repeat, stretching then folding the dough three more times so the seam faces upward. Turn ball seam side down, dust with flour then cover again and let sit for 1 hour.
- Remove cover once again and perform 4 coil folds (*see notes), lifting and stretching the dough from the centre, turning clockwise 90 degrees after each fold until 4 to 6 folds have been completed. Tuck edges underneath and brush entire surface of dough with olive oil. Cover bowl tightly and let stand to rise overnight.
- Once the dough has doubled or tripled in size by morning, it’s ready to be divided. Turn out the dough onto a lightly floured surface and dust with flour. Using a dough scraper, divide it into equally sized portions (two or three pieces depending on how many pizzas you’re making).
- Sprinkle a little flour on your hands then pre-shape your pizza dough using the cinch method (*see notes). Working gently and taking care not to degas the dough, slowly fold each section over into itself while turning it in your hands, pinching the dough towards the bottom as you go to create a ball with no seam left. Repeat with remaining sections, placing them into a lightly floured, high-walled baking dish as you go. (I like to use an airtight glass covered baking dish at this stage, but a baking sheet and plastic wrap will also work.) Lightly flour the tops, cover and let proof for 5-6 hours until you’re ready to stretch out your dough. At this point the dough balls will have relaxed a little and be soft and puffy to the touch.
- Once you’re ready to bake your pizza, transfer dough, still in proofing container, to refrigerator and chill for at least 30 minutes. This cold proof will help further strengthen the dough to make it easier to shape. While the dough is chilling, preheat oven to 500ºF (260ºC) and prepare your toppings.
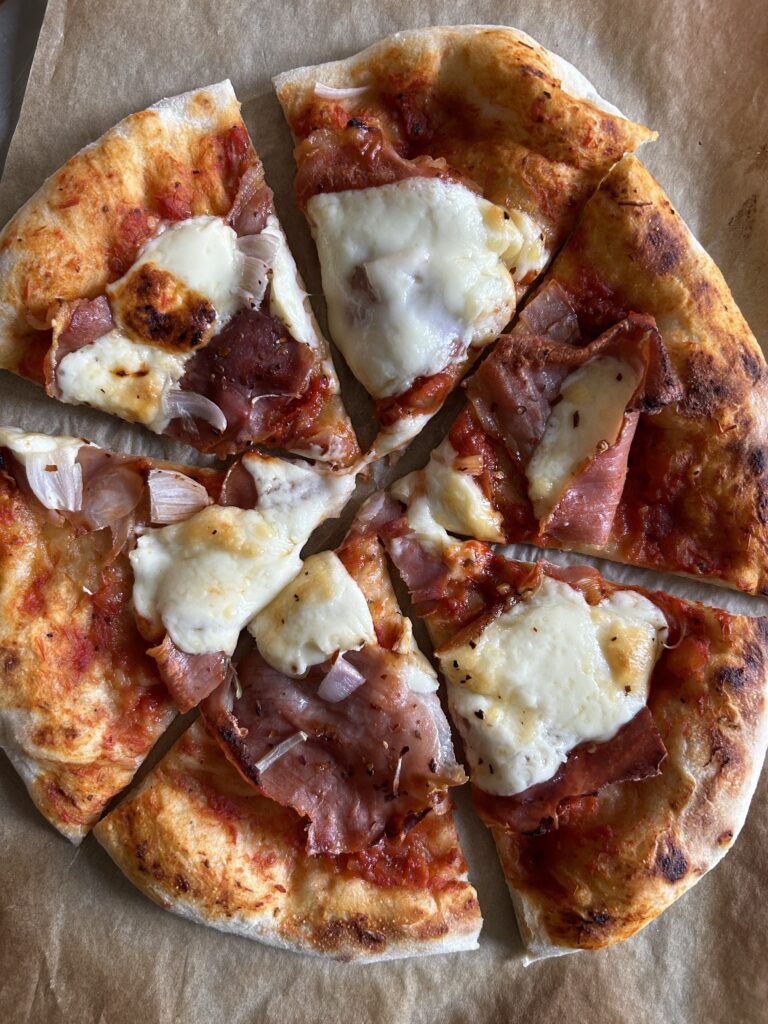
- Scrape the first dough ball out onto a generously floured surface. Using floured hands and working from the inside out, press and stretch the dough outwards to shape your crust being careful to leave a 1-inch margin at the edges with any air bubbles left untouched. Once shaped, gently lift and transfer the dough onto parchment paper. Assemble pizza(s) with tomato sauce and your desired toppings then transfer to baking steel and bake for 6-7 minutes (for smaller pizzas) or 8-9 minutes (for a larger pizza) until golden with slightly charred edges. (*Optional: Once baked, turn oven to broil, remove parchment and continue cooking under the broiler for ~2 minutes to deepen charring.)
Notes
- Mix at 8 am and let rise for 1 hour.
- Perform one set of stretch and folds.
- Cover and let rise for 8 hours.
- At 5 pm, shape dough into balls, cover and refrigerate for 1 hour.
- Assemble pizza after 6 pm (or any time over the next 3 days) and bake!

Leave a Reply