• About
  • All Recipes
  • Shop
  • Newsletter
  • Start Here
  • Contact
  • About
  • All Recipes
    • Bread Recipes
    • Breakfast
    • Dessert and Sweet
    • Dips, Jams and Spreads
    • Sauces and Dressings
    • Soups and Salads
    • Snacks and Sides
    • Mains
    • Pizza
  • Bread
    • Artisan Bread Basics + FAQ’s
  • Start Here
  • Nav Social Icons

  • Skip to primary navigation
  • Skip to main content
  • Skip to primary sidebar

Harvest & Nourish

Simple, scratch-made recipes and artisan breads.

Artisan Bread Basics, Bread Recipes · February 11, 2026

Artisan Bread Basics: How Cold Proofing Changes the Game + Answers to FAQ’s

This post may contain affiliate links, please see our privacy policy for details.

Last updated on April 16th, 2026

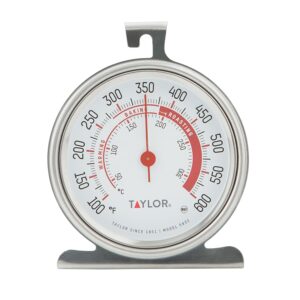
In the Temperature instalment of this series, we discussed how ingredient, room and oven temperatures are key factors in determining your optimal baking schedule and ensuring a good result. Now we’ll dive into a separate temperature-related component—cold proofing—and why it will give you even better results.

In this post, we’ll cover:

  • Proofing basics—what it is and how it differs from the first rise (bulk fermentation)
  • The best temperature for proofing dough—hint: there isn’t just one
  • How my artisan bread recipes differ from others
  • My #1 artisan bread making tip
  • The benefits of cold proofing
  • Answers to frequently asked questions
Cinnamon Raisin Artisan Bread. - harvestandnourish.com
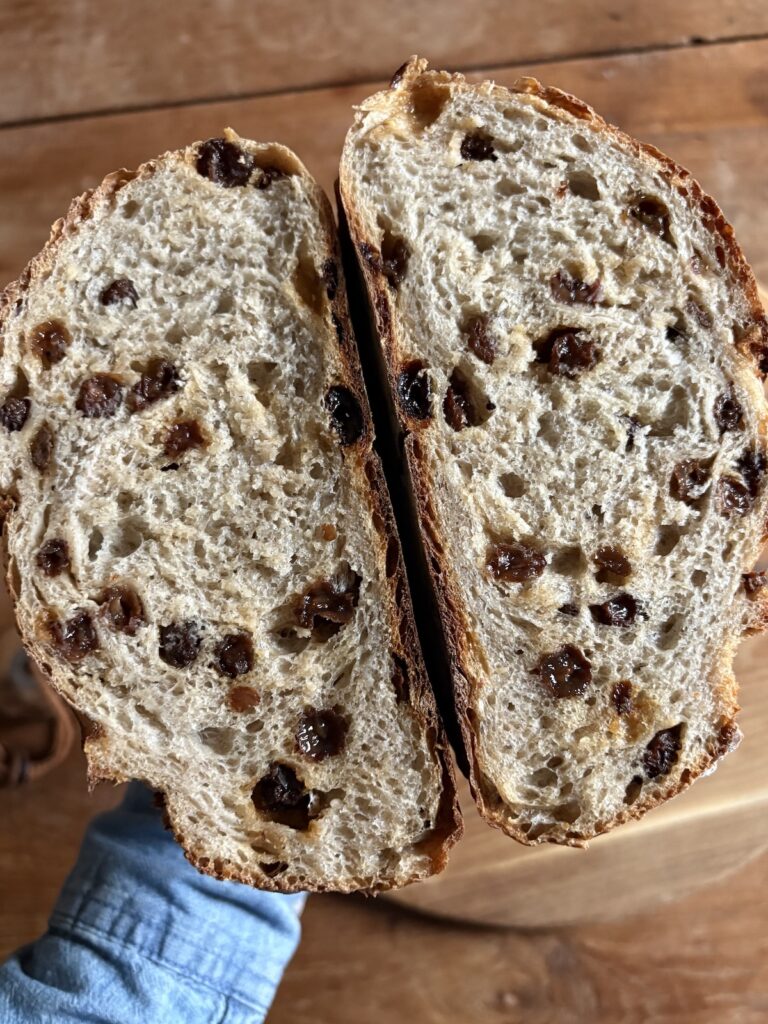
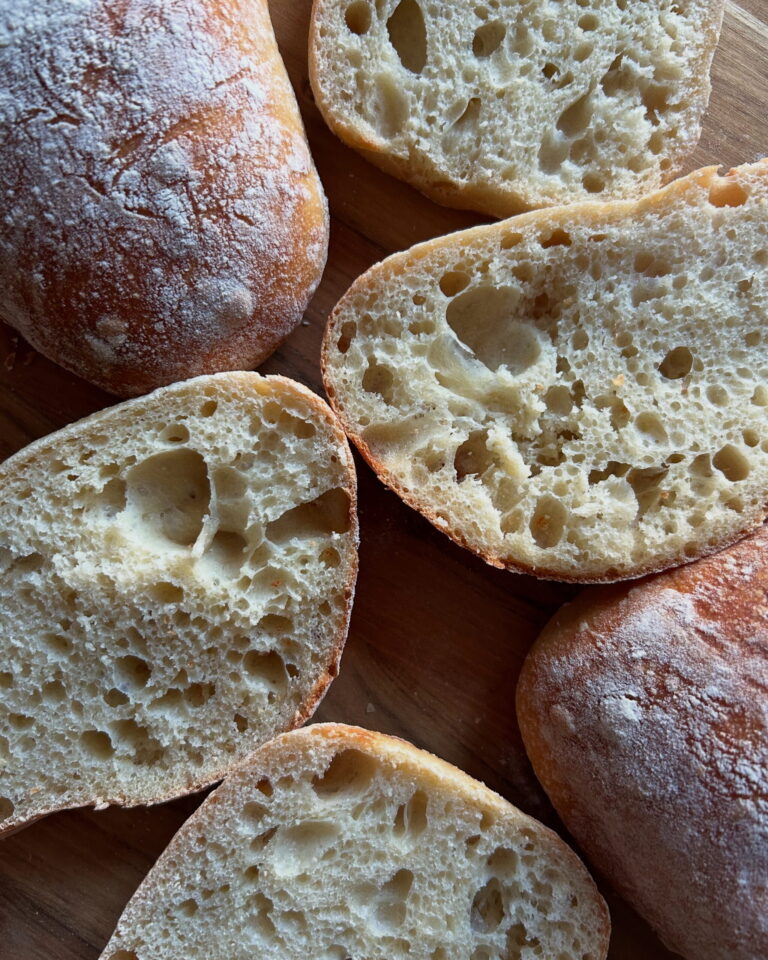
No-Knead Cinnamon Raisin Artisan loaves with cold proofing (left) and without (right).

You can find the recipe for Cinnamon Raisin Artisan Bread here.

You can find my Everyday Artisan Bread recipe here.


What is proofing?

Let’s begin by going over the basics. Proofing, in this case cold proofing, is the last step after shaping the dough before it’s baked.

This step is sometimes called the second rise or “proving” the dough and it —as well as the word “proofing”— is often confused with the first rise or bulk fermentation.

The key difference is that at this stage the dough has been shaped into a cohesive loaf and no longer resembles the sticky, bubbly mass it is during the first rise. During cold proofing, the dough continues to ferment, enhancing gluten formation and increasing volume, but in a slowed and controlled environment.

What is the best temperature for proofing dough?

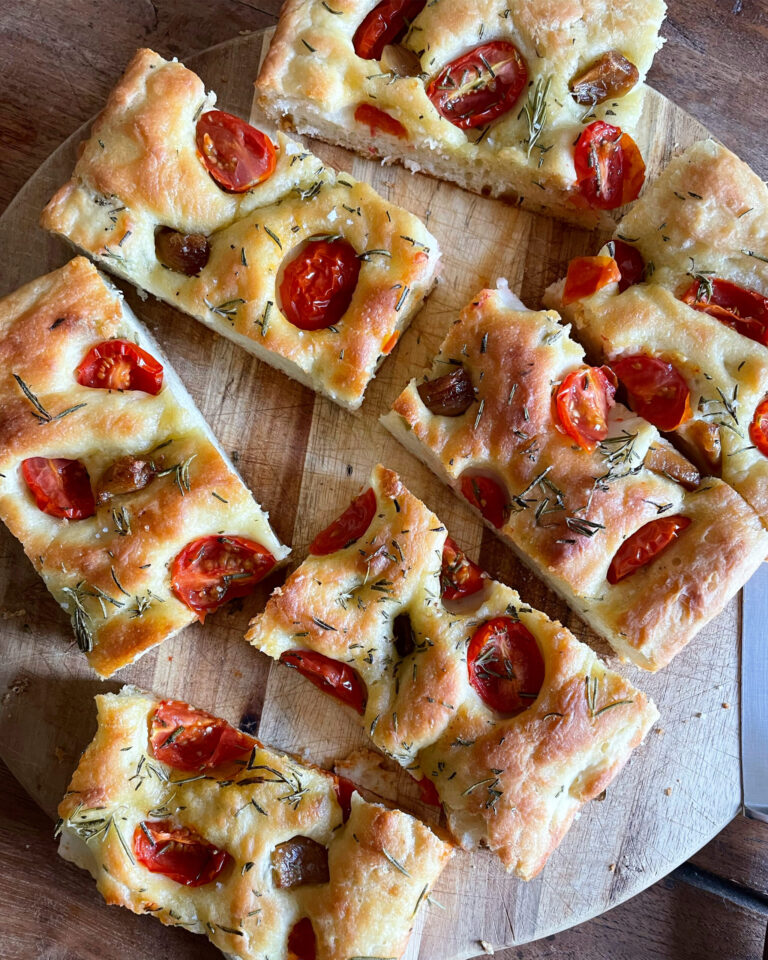
As it turns out, there isn’t just one. It all depends on the type of dough you’re working with, the taste and texture you’re looking for, and your baking schedule. Same day proofing, as called for in these Honey Whole Wheat Sandwich Bread, Buttermilk Dinner Rolls or Simple Focaccia recipes, is typically done at room temperature. Cold proofing (called retarding in sourdough bread-making) is where the dough is proofed at a cold temperature in the refrigerator, usually overnight. This is what I call for in artisan bread recipes like this Cranberry Walnut and this Green Olive & Rosemary. The dough is then scored and baked straight from the fridge.

More on the benefits of cold proofing below. 


How my artisan bread recipes differ from others

Unlike most artisan bread recipes—including previous versions of my own—my recipes call for a long cold proof.

When I first started making artisan breads, I went with the most common approach of leaving the dough to rise somewhere warm for 8 to 24 hours until it had doubled in volume (or until I was ready to bake it). Even with optimal conditions, however, the 8 to 24-hour window is fairly open-ended. For many, your dough will be ready to bake much sooner due to temperatures and environmental conditions. 

On the other hand, it can be all too easy to mix your dough, set it aside and forget about it only to discover that it has tripled in volume and turned into a sticky mess. This approach also assumes that you’ll bake your bread right away, and what if you can’t? 

With these questions in mind, I went in search of a solution that would allow me to produce an even better result. One that would rely on a more controlled and reliable method and work under almost any circumstances. The answer was to be found in my 4-Ingredient Artisan Pizza Dough recipe.

My #1 artisan bread making tip

Knowing your optimal rise time and cold proofing the dough in the refrigerator will vastly improve your loaves.

As a home baker, the overnight method definitely works for me, and building in the added step of an overnight cold proof makes for even better bread.

Putting the dough in the fridge once it has completed its first rise and been shaped has been a game changer.

Here’s why:

The benefits of cold proofing bread dough

  • Better browning.
  • Improved structure due to strengthened gluten formation.
  • Bubblier, softer, chewier crusts.
  • A more complex, richly flavoured loaf.
  • More flexibility in terms of when to bake—it makes scheduling easy!
  • It makes scoring your loaf a lot easier.

The added step of cold proofing the dough results in a much lighter, open and airy crumb with the added benefit of reducing the risk of over-fermentation.

The longer the cold proof, the better the result. Whether you choose to bake your loaf after a 4-hour cold proof or a 24-hour cold proof, once you remove it from the fridge all you have to do is reshape it if needed, score it, then bake. There’s no need for a second proof.


Frequently asked questions

Q. Should bread dough be covered or uncovered during a cold proof?

Air circulation systems in most refrigerators will dry out your dough, so covering it with plastic wrap or a floured tea towel (or similar) is recommended. I’ve done both and will only use plastic for shorter cold proofs because it creates a micro-environment that seals in humidity. For longer proofs, I prefer to use a flour covered tea towel. This is because over time, the added humidity created by the plastic will result in over-fermentation of an already well-hydrated dough. The dough will lose its shape and develop a yeasty smell and taste.

Q. How long is “overnight”?

All my artisan bread recipes are very forgiving and include a suggested baking schedule that you can adapt to your own. The exact number of hours can vary depending on when the dough was mixed. Aim for between 10 and 16 hours. 

Q. Does the dough have to double in size during the proofing stage?

No, dough sizes can vary based on a number of factors such as flour type, hydration level and shaping technique. There only needs to be some rise in the dough to be sure there is good fermentation activity. Your visual cue is that it will continue to rise while in the refrigerator and begin to take on the appearance of a baked loaf. 

Q. My dough has been left in the fridge for more than 24 hours, what can I do?

I’ve left bread dough in the fridge for up to 48 hours, and while the final loaf had a somewhat punchier taste and less rise, it was still delicious. 

Q. I’ve been making your bread recipes for years, can I still do it the same way?

Of course! The added step of cold proofing your dough is recommended. Not doing so will result in a milder flavour and a dough that is less structured and harder to score. What really matters, however, is that you use the method that works best for you. With time and practice you will refine the method that best suits your environment, preferences and schedule.

This post has been revised and updated since first published July 17, 2025.


Please feel free to leave any questions, comments or reviews. This is the best place to reach me, and I’d love to hear from you!


Posted In: Artisan Bread Basics, Bread Recipes

Cranberry Walnut Artisan Bread. - harvestandnourish.comNo-Knead Cranberry Walnut Artisan Bread
Lemon Blueberry Scones. - harvestandnourish.comMy Favourite Blueberry Scones
Oven ThermometerArtisan Bread Basics: Temperature, Dutch Ovens + Answers to FAQ’s

Reader Interactions

Leave a Reply Cancel reply

Your email address will not be published. Required fields are marked *

Recipe Rating


Next Post >

Artisan Bread Basics: Temperature, Dutch Ovens + Answers to FAQ’s

Primary Sidebar

About Photo
Hello! I'm Kerry. Recipe developer, bread enthusiast and founder of Harvest & Nourish. I'm so glad you're here 🌻

Free Recipes & Updates!

TRENDING RECIPES

What’s in the pantry?

let’s connect

ON INSTAGRAM

This coconut rhubarb breakfast cake is everything This coconut rhubarb breakfast cake is everything I want in an early summer bake. A simple ingredient list that combines wholesome pantry staples with fragrant vanilla, jammy, sweetly tart rhubarb and chewy, buttery coconut. A delicious seasonal breakfast, snack or dessert. 

Full recipe is on my site at harvestandnourish.com or comment “recipe please” and I’d love to send you the link! 

https://harvestandnourish.com/coconut-rhubarb-breakfast-cake/

#cake #rhubarbrecipes #springbaking #springdessert
Cranberry Orange Scones 🍊 Made with loads of cranb Cranberry Orange Scones 🍊 Made with loads of cranberries, buttermilk and citrus then flavoured with warming cinnamon and cardamon, they’re finished with a crunchy turbinado sugar topping. This recipe relies on less sugar than most sweet scone recipes, you can use either fresh or frozen berries, and they can even be made ahead of time to freeze or bake later. 

Full recipe is on my site at harvestandnourish.com or comment “recipe please” and I’d love to send you the direct link! 

https://harvestandnourish.com/cranberry-orange-scones/

#scone #scones #cranberryorange #brunchideas
These classic Old Fashioned Date Squares are delic These classic Old Fashioned Date Squares are deliciously sweet with a chewy oatmeal crust. A simple blend of brown sugar, sweet dates, butter and oats, they’re super quick to mix up and my ideal treat for a cozy afternoon.

Full recipe is on my site at harvestandnourish.com or comment “recipe please” and I’ll send it to you! 

https://www.harvestandnourish.com/old-fashioned-date-squares

#dates #datesquares #oldfashioned #oatbars #easydesserts
These super simple skillet roasted chicken thighs These super simple skillet roasted chicken thighs require just 5 minutes prep time making them ideal for busy weeknights. The seasoning possibilities are endless, and the oven does all the work! Plus, the one step that makes all the difference to get perfectly tender chicken with deliciously crispy skin every time.

Full recipe is on my site at harvestandnourish.com or comment “recipe please” and I’ll send you the direct link! 

https://harvestandnourish.com/skillet-roasted-chicken-thighs/

#chicken #roastchicken #castironcooking #easy #dinnerrecipes
This Mediterranean-inspired no-knead Green Olive a This Mediterranean-inspired no-knead Green Olive and Rosemary Artisan Bread is chock full of fresh, robust flavours. Made with bold, aromatic rosemary and crisp, buttery green olives, it’s fresh and bright, a little chewy and perfect for lighter meals and snack boards. If you’re a bread beginner, this recipe includes lots of tips and a suggested baking schedule to help you along the way. 

Full recipe is on my site at harvestandnourish.com or comment “recipe please” and I’d love to send you the direct link! ☀️

https://www.harvestandnourish.com/no-knead-green-olive-and-rosemary-artisan-bread

#nokneadbread #olivebread #castelvetrano #easybreadrecipe #rosemaryolivebread
If you’re like me and missing out on all the excit If you’re like me and missing out on all the excitement around spring ramps, these cheddar scallion drop biscuits are here for you. Ready in 30 minutes, they’re deliciously buttery and tender without any rolling or cutting. Just drop them onto a sheet pan and bake!

Full recipe is on my site at harvestandnourish.com or comment “recipe please” and I’ll send you the direct link!

https://harvestandnourish.com/cheddar-scallion-drop-biscuits/

#biscuits #cheesebiscuits #cheddar #scallions #easyrecipes
  • Privacy Policy & Terms of Use
  • Artisan Bread Basics + FAQ’s
  • Contact

Copyright © 2026 Harvest & Nourish · Theme by 17th Avenue