• About
  • All Recipes
  • Shop
  • Newsletter
  • Start Here
  • Contact
  • About
  • All Recipes
    • Bread Recipes
    • Breakfast
    • Dessert and Sweet
    • Dips, Jams and Spreads
    • Sauces and Dressings
    • Soups and Salads
    • Snacks and Sides
    • Mains
    • Pizza
  • Bread
    • No-Knead Artisan Bread Basics + FAQ’s
  • Newsletter
  • Start Here
  • Nav Social Icons

  • Skip to primary navigation
  • Skip to main content
  • Skip to primary sidebar

Harvest & Nourish

Simple, scratch-made recipes and artisan breads.

All Recipes, Bread Recipes · May 24, 2026

Everyday Sandwich Bread

This post may contain affiliate links, please see our privacy policy for details.

Jump to Recipe Print Recipe
Everyday Sandwich Bread. - harvestandnourish.com

This is just a really great, really easy Everyday Sandwich Bread. I’ve always believed that the simplest baking recipes tend to be the best. You don’t need to fuss too much with them, you don’t need any special appliances, and you can rely on the ingredients in your pantry. That’s my baking philosophy.

This is a staple recipe that already feels like it has the makings of a tried-and-true classic.

It started with wanting to develop a recipe for baked egg cups to feed a crowd. The egg cups are still a work in progress, but this Everyday Sandwich Bread is ready for its moment in the sun. A simple no-knead, pantry staple recipe, it requires just 15 minutes of hands-on prep time.

Using my Honey Whole Wheat Sandwich Bread as a starting point, I wanted a softer loaf with enough structure to still hold up well for sandwiches (and for baking in a muffin tin), but without the pronounced sweetness typically associated with breakfast loaves.

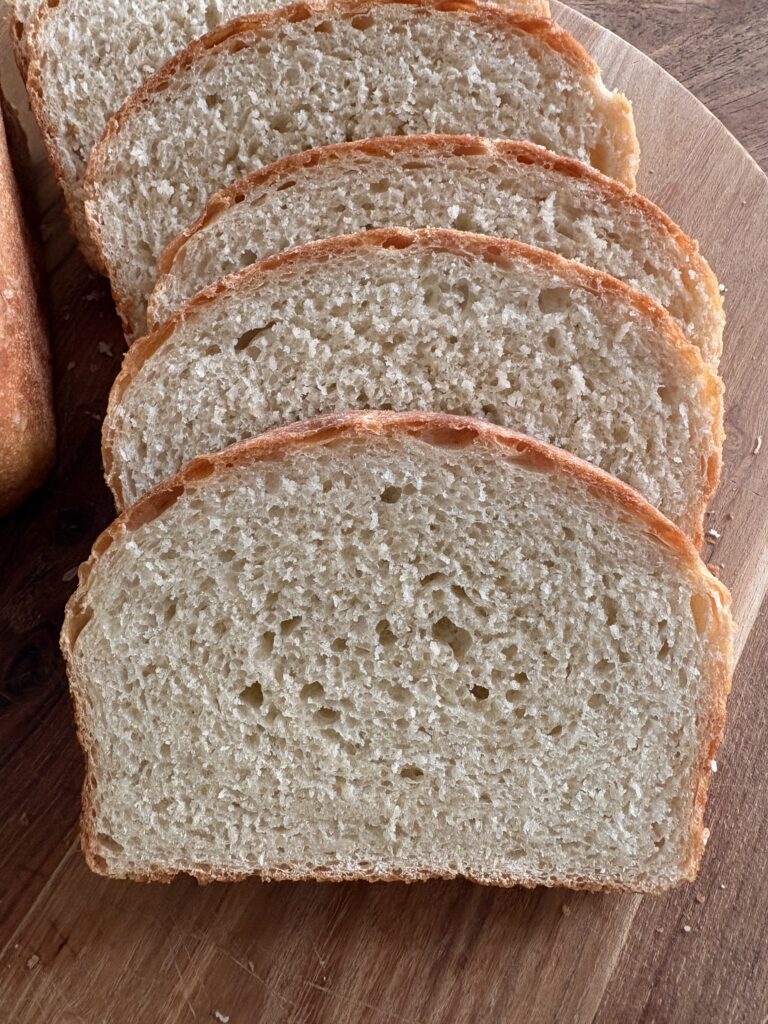
The result is a soft and airy loaf that tastes just like the bread my aunt made when we were kids—most often served with big chunks of cold butter and a drizzle of honey.

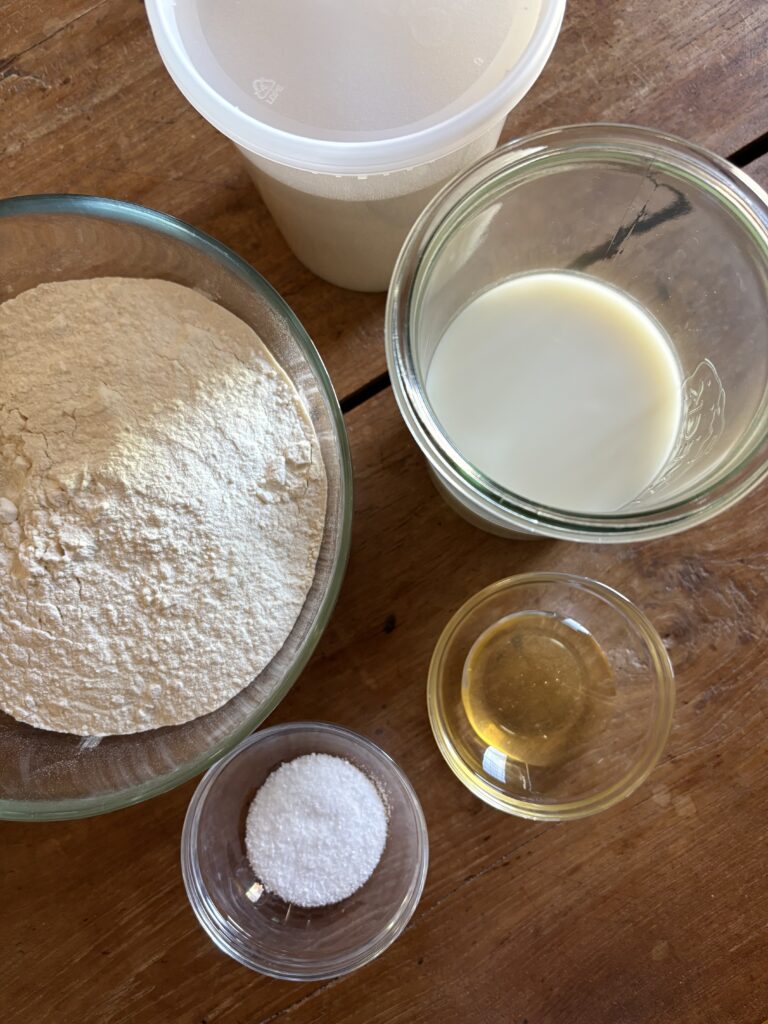
Here’s everything you’ll need to make it

  • 180 grams (¾ cup) water, room temperature
  • 180 grams (¾ cup) milk of your choice, room temperature
  • 21 grams (1 tablespoon) honey (optional)
  • 6 grams (2 teaspoons) active dry yeast
  • 460 grams (about 3½ cups) bread flour
  • 9 grams (3 teaspoons) kosher or fine sea salt
  • Olive oil for drizzling
  • Softened butter for coating the pan
Everyday Sandwich Bread. - harvestandnourish.com

New to working with yeast? Reference my Baking with Active Dry Yeast guide for answers to common FAQ’s.


Why make this Everyday Sandwich Bread?

If you’re wondering what makes this loaf so practical and reliable, here are a few standout reasons to add it to your baking rotation:

  • One-Bowl, One-Pan Simplicity—This bread recipe is as straight-forward as it gets, making it minimal cleanup, maximum reward.
  • Balanced Eating—It’s made with high-protein bread flour and a handful of pantry staple ingredients. Unlike its store-bought counterparts, it contains no additives, preservatives, artificial sweeteners or ingredients you can’t pronounce. 
  • Minimal hands-on prep time—Most of the work is done during rest time (or when you’re asleep!) and while it bakes. 
  • Customizable—Use the measurements as a guide and experiment with your favourite flours, dairy-free milks or seasonings.
  • Versatility—This simple, no-knead sandwich bread is great for sandwiches of all kinds, grilling, toasting or as a base for other recipes. Also, great for breadcrumbs.
Everyday Sandwich Bread. - harvestandnourish.com

Tips for making this Everyday Sandwich Bread

Measurements: As always, I recommend using a digital scale to measure your ingredients for accuracy. The one I use is highly rated and reasonably priced, and it really is a foolproof way to ensure your ingredient measurements are correct.

Flour: I make all my breads using high-protein bread flours. Other flours may be substituted with varying results, including good quality, gluten-free bread flour blends.

Yeast: I prefer to bake with active dry yeast. If using instant yeast, add it directly to the dry ingredients. If baking overnight, see note in the recipe card.

Salt: I cook and bake with kosher salt. Diamond Crystal Kosher Salt is my go-to and what I use in almost all my recipes. Fine sea salt is a great alternative. It’s important to note that when cooking or baking with salt the quantity you use will vary depending on type and brand. As a general rule, if using Morton’s kosher salt, which has a coarser texture, double it. If using table salt, reduce by half.

I’ve added an additional step—a simple set of stretch and folds—to the method in this recipe. It helps strengthen the gluten, which results in a stronger, more airy dough with the loftier rise that comes to mind when we think of traditional sandwich breads.

Rise time: Rest times may vary according to room temperature and environmental conditions. With a little practice, you will find the timing that works best for you. 

Hydration: This is an 80% hydration dough. After the first rise, it will be sticky with lots of bubbly fermentation activity. It will stick to your hands and to the sides of the bowl until you turn it out onto a floured surface and start shaping it. That’s good! Rest assured that once you do, it will come together quickly.

Loaf pan: This recipe works perfectly when baked in a 9×5-inch loaf pan like this one.

Bake it in under 5 hours or let it rise overnight: I tend to prefer the ease and fuller flavour that come with an overnight rise. The night before, I usually start around 8 pm, do a quick set of stretch and folds around 9 pm and let it rise on the counter overnight. *See note on yeast in the recipe card if you’d like to do this. 

How to make Everyday Sandwich Bread in 5 steps 

  1. Mix dough, cover and set aside for 30 minutes.
  2. Perform a set of stretch and folds, cover and let rise for 2 to 3 hours.
  3. Shape loaf, transfer to pan and let rise for 1 hour or until it crowns the rim of the pan.
  4. Bake for 45 minutes.
  5. Transfer to wire cooling rack and let cool completely before slicing.

This is what it looks like

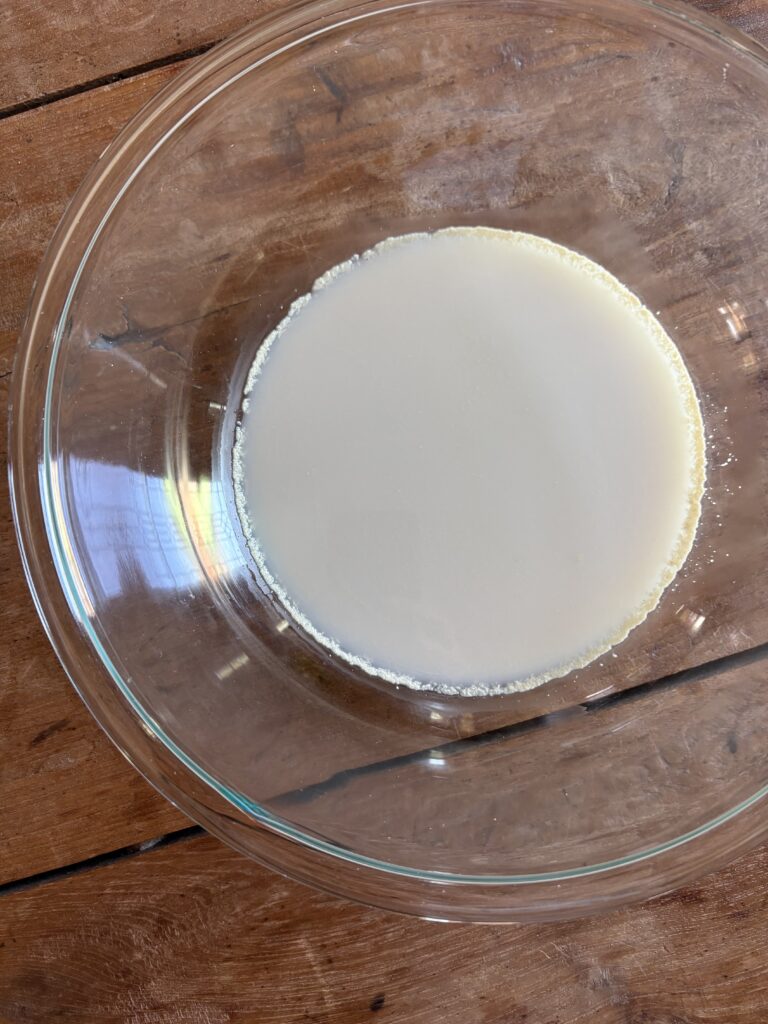
Whisk together milk, water and honey, sprinkle yeast over top and let sit for 10-12 minutes.

Everyday Sandwich Bread. - harvestandnourish.com

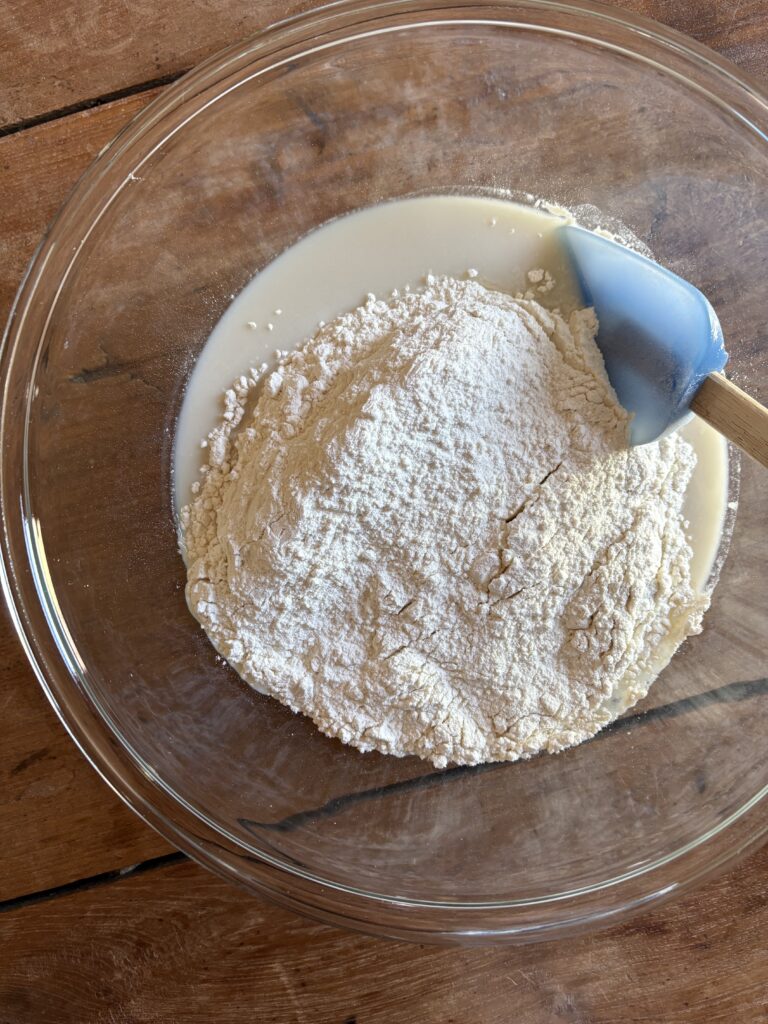
Add flour and salt…

Everyday Sandwich Bread. - harvestandnourish.com

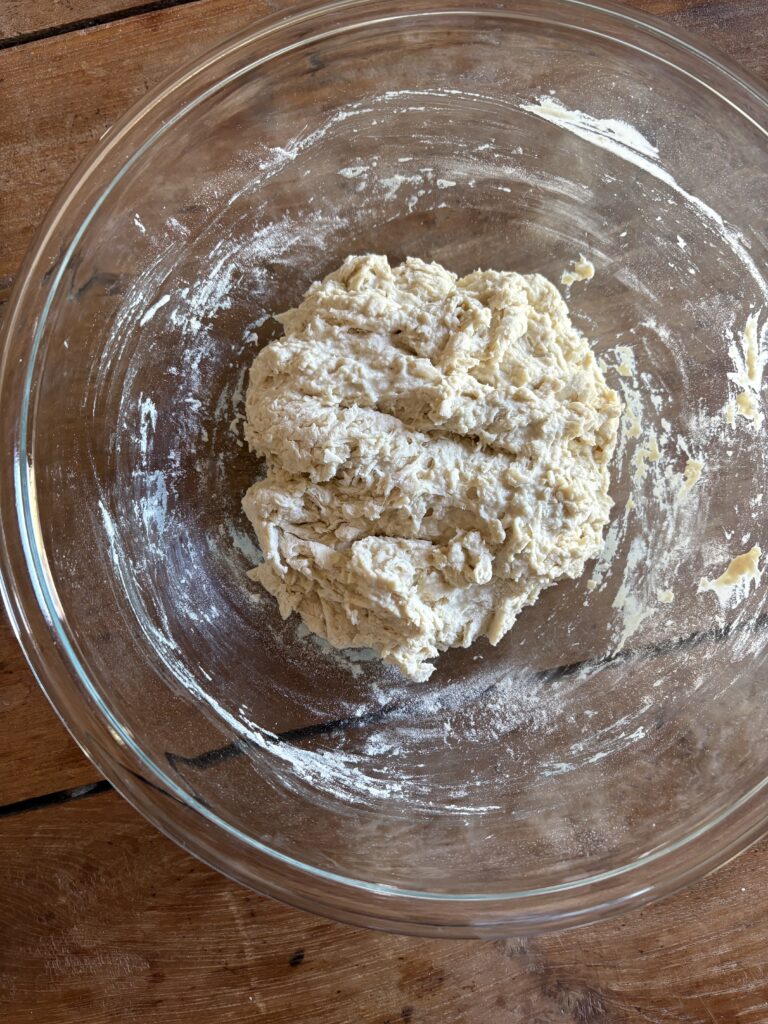
mix again, cover and set aside for 30 minutes.

Everyday Sandwich Bread. - harvestandnourish.com

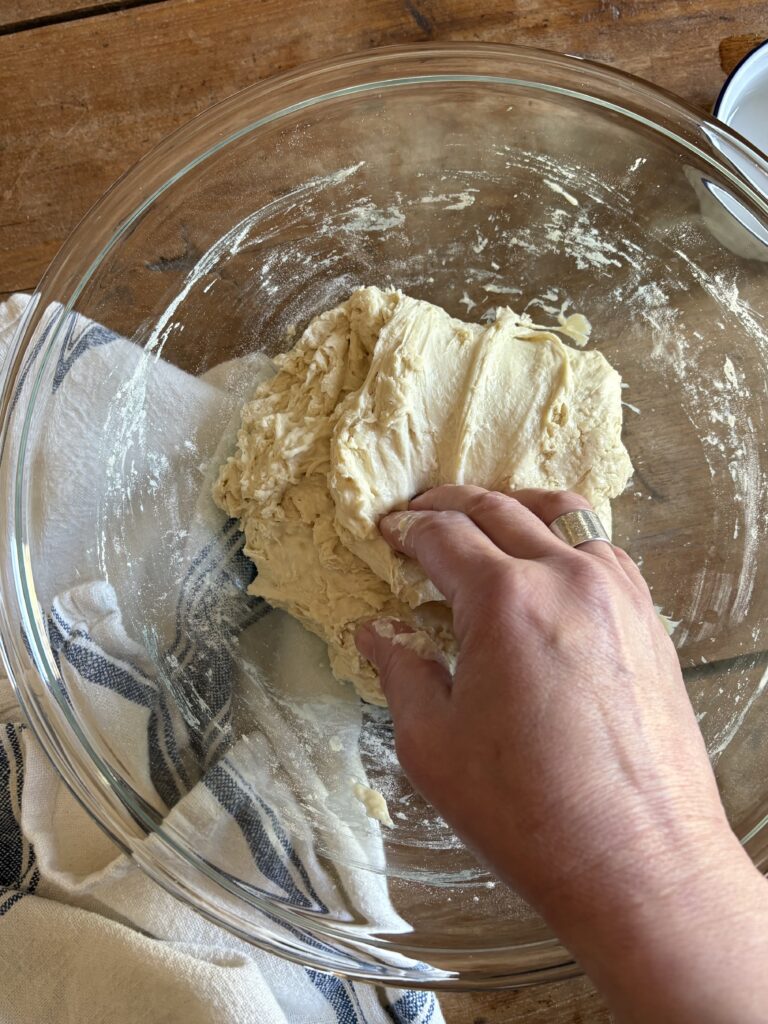
Next, we’ll do the stretch and folds.

Everyday Sandwich Bread. - harvestandnourish.com

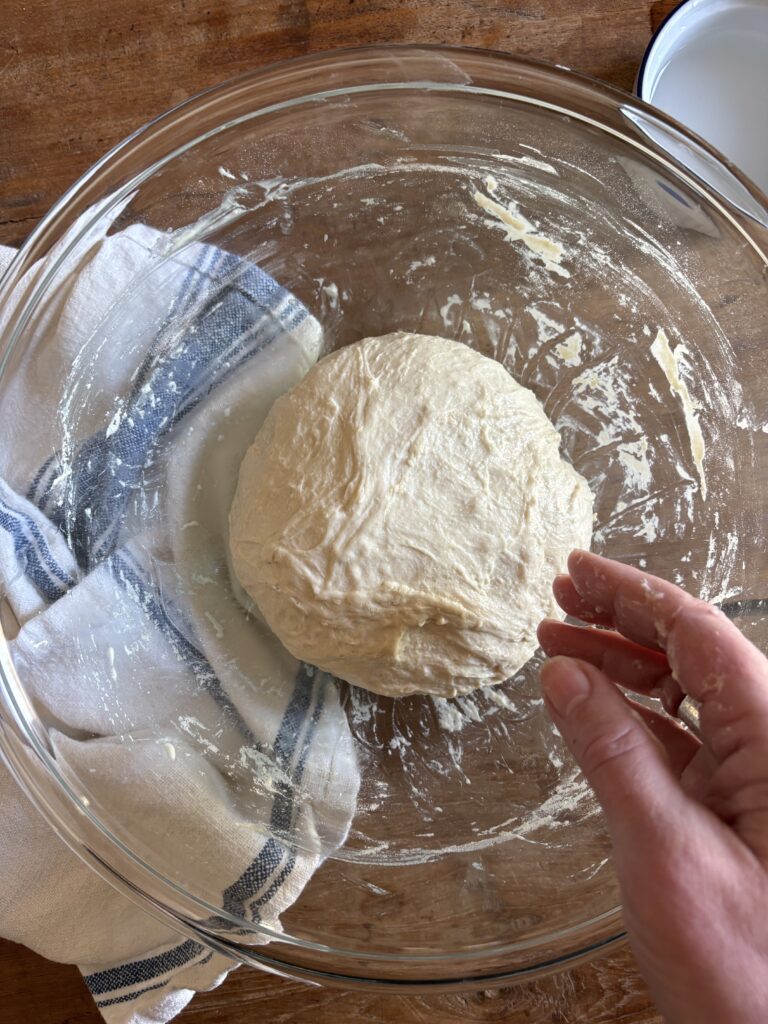
Until the dough has been shaped into a ball.

Everyday Sandwich Bread. - harvestandnourish.com

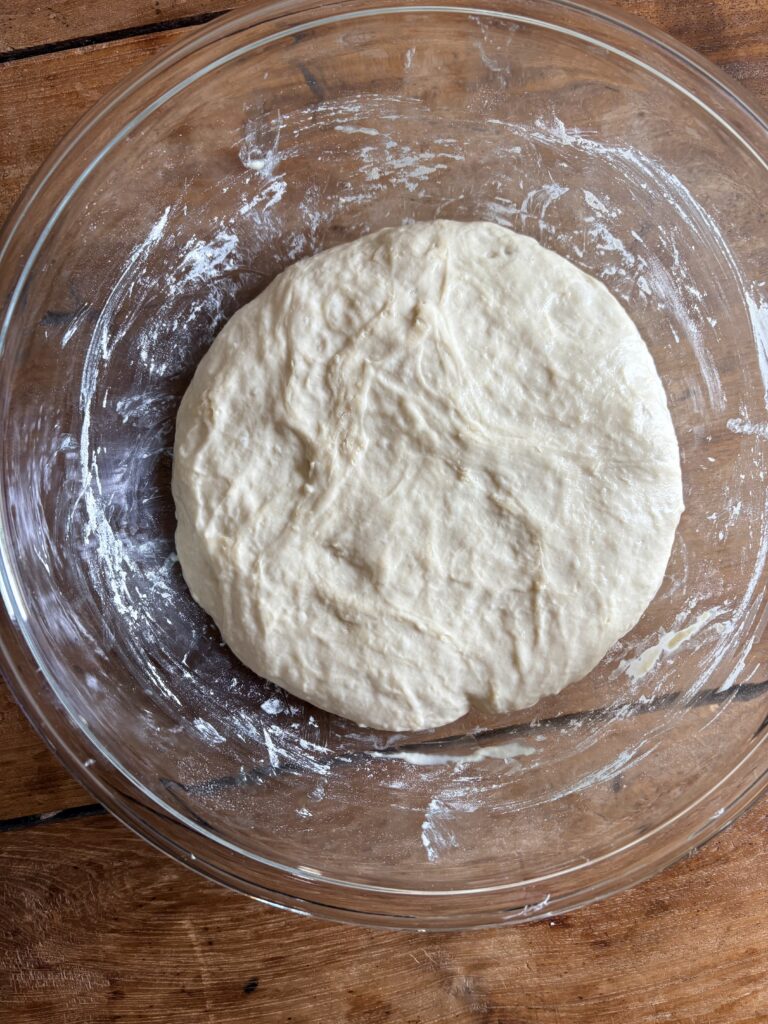
Then cover and let rise until it has doubled in volume, about 2 hours.

Everyday Sandwich Bread. - harvestandnourish.com

Using either a floured hand or flexible dough scraper, pull the dough out onto a lightly floured surface.

Everyday Sandwich Bread. - harvestandnourish.com

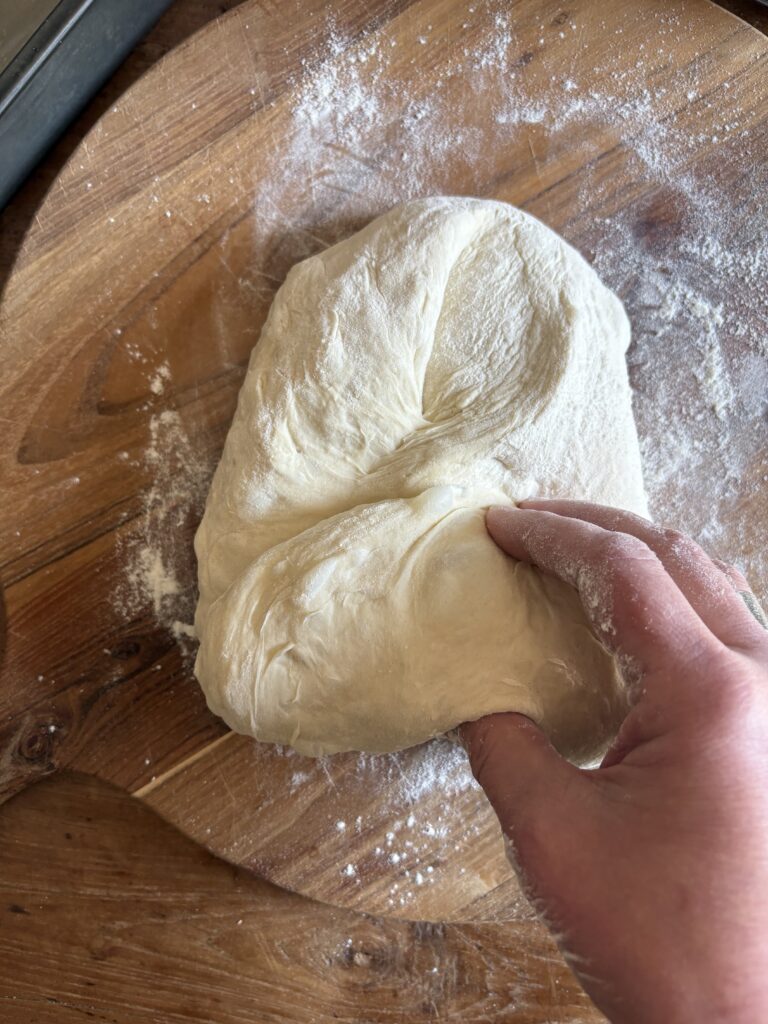
Shape it into a loaf then turn it over and do a letter fold.

Everyday Sandwich Bread. - harvestandnourish.com

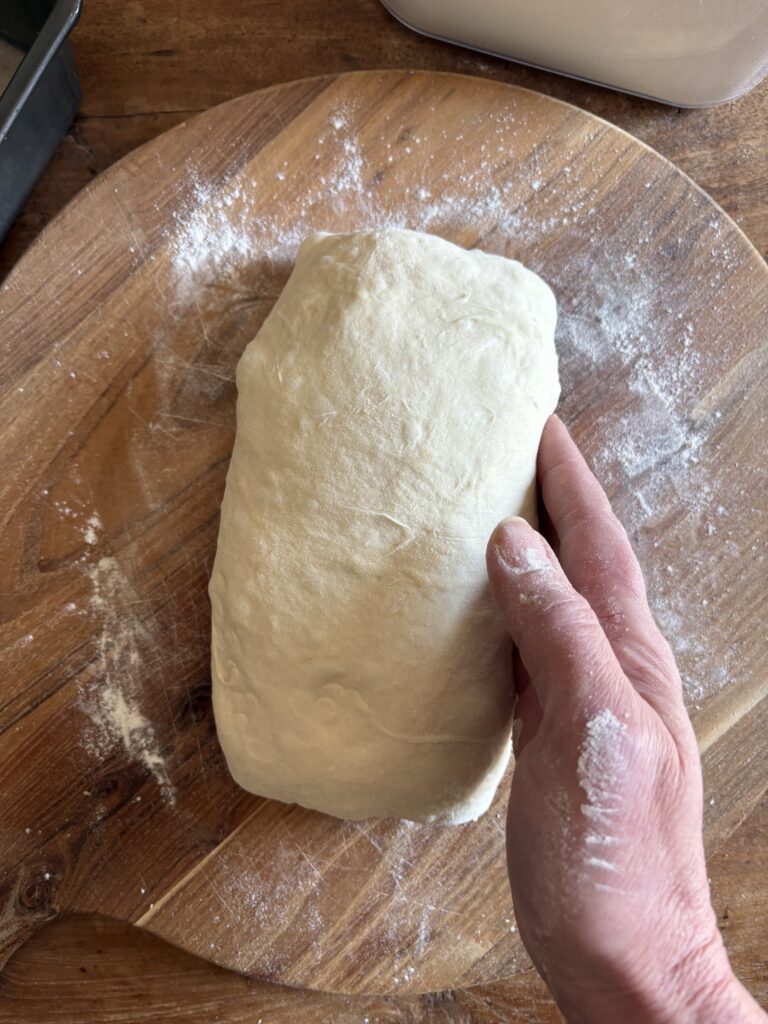
Next, turn it seam side down…

Everyday Sandwich Bread. - harvestandnourish.com

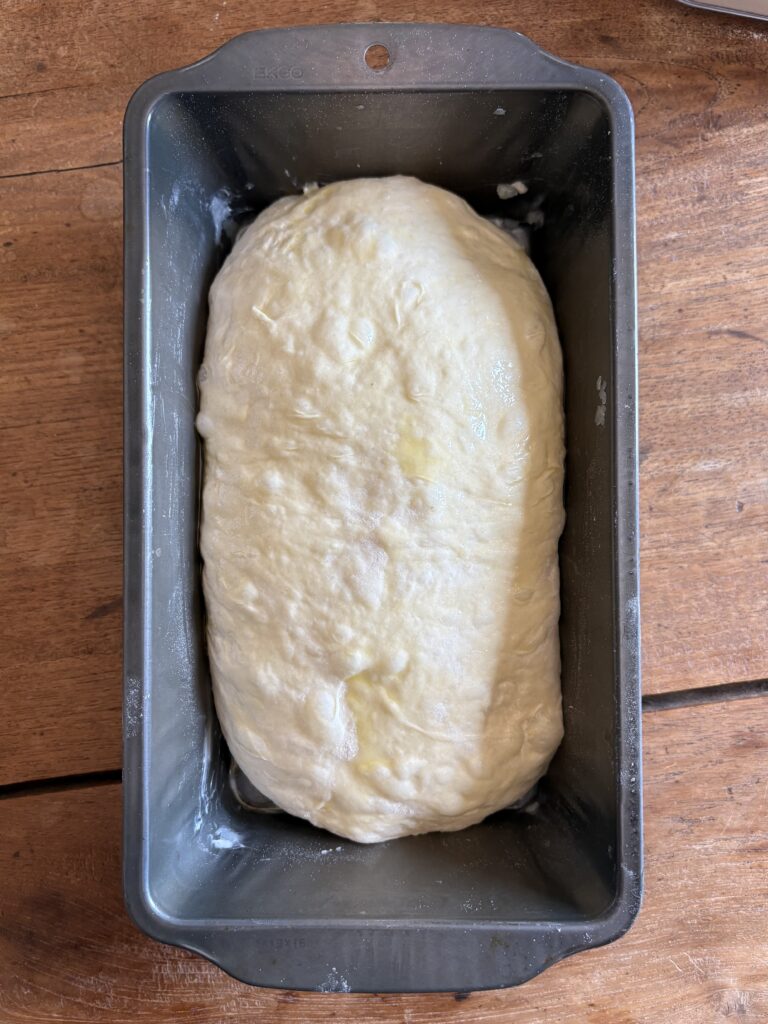
…then transfer it to a buttered loaf pan, rub with olive oil, and let it rise for another hour before baking.

Everyday Sandwich Bread. - harvestandnourish.com

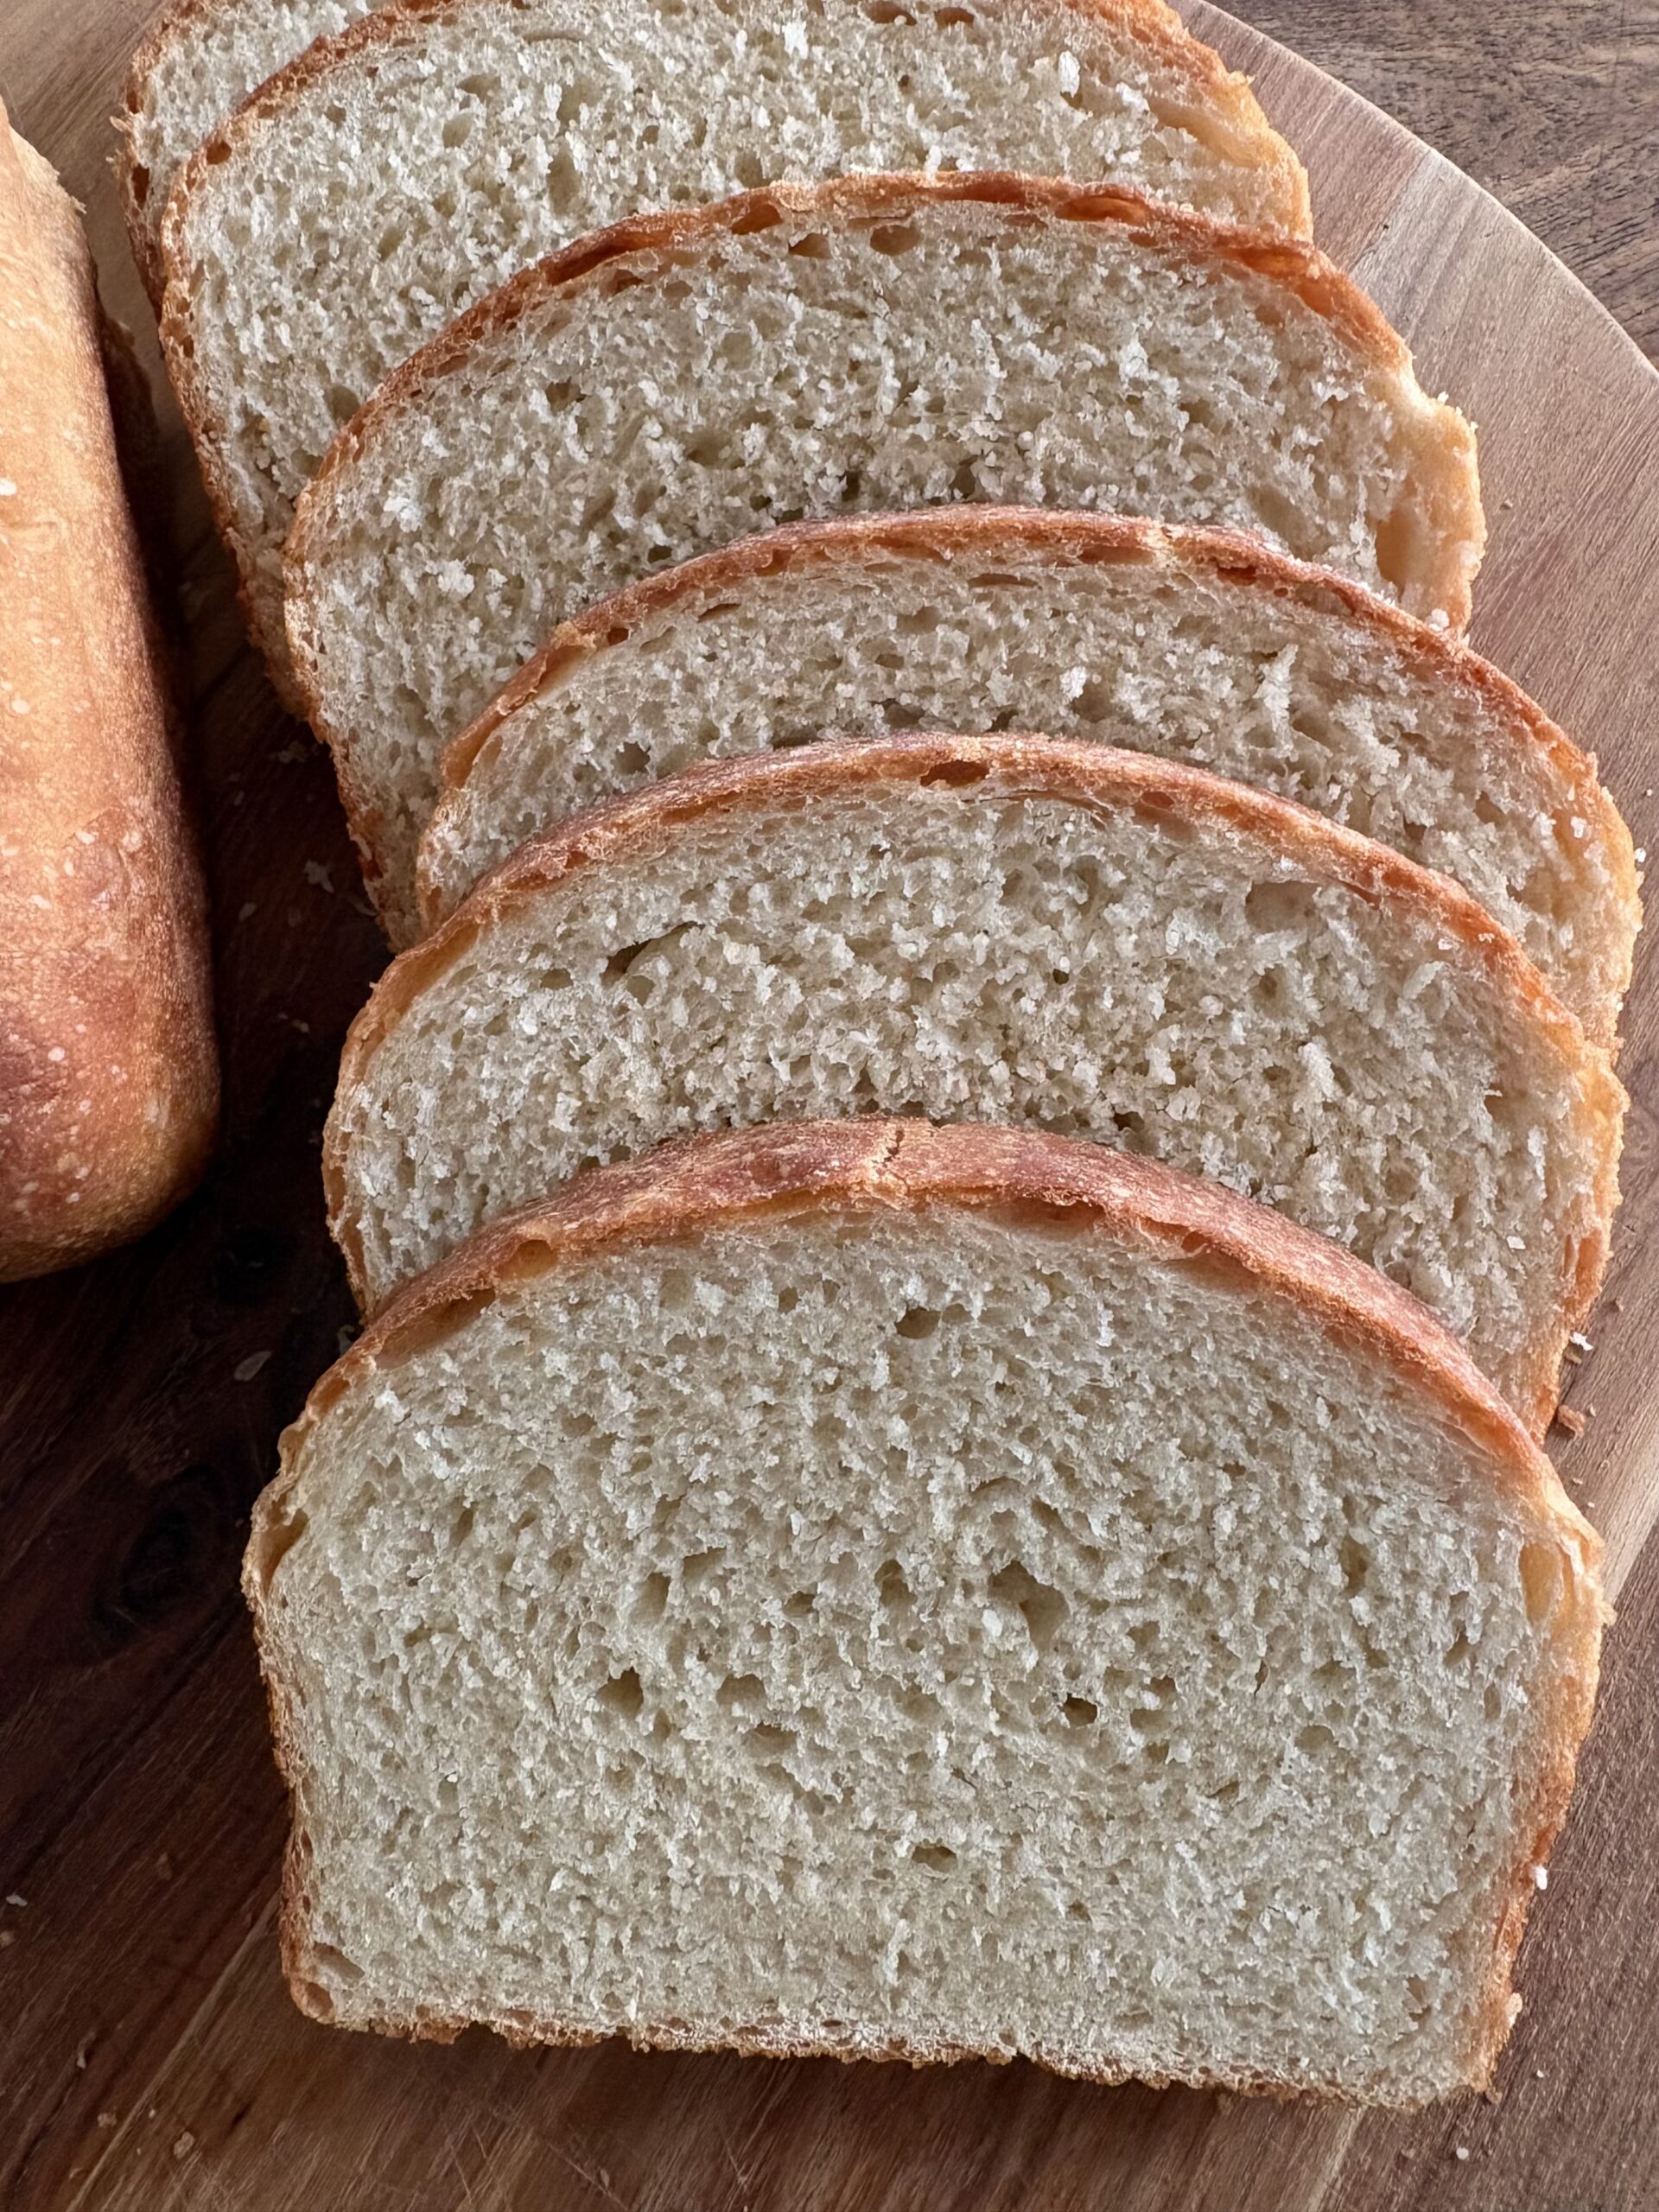
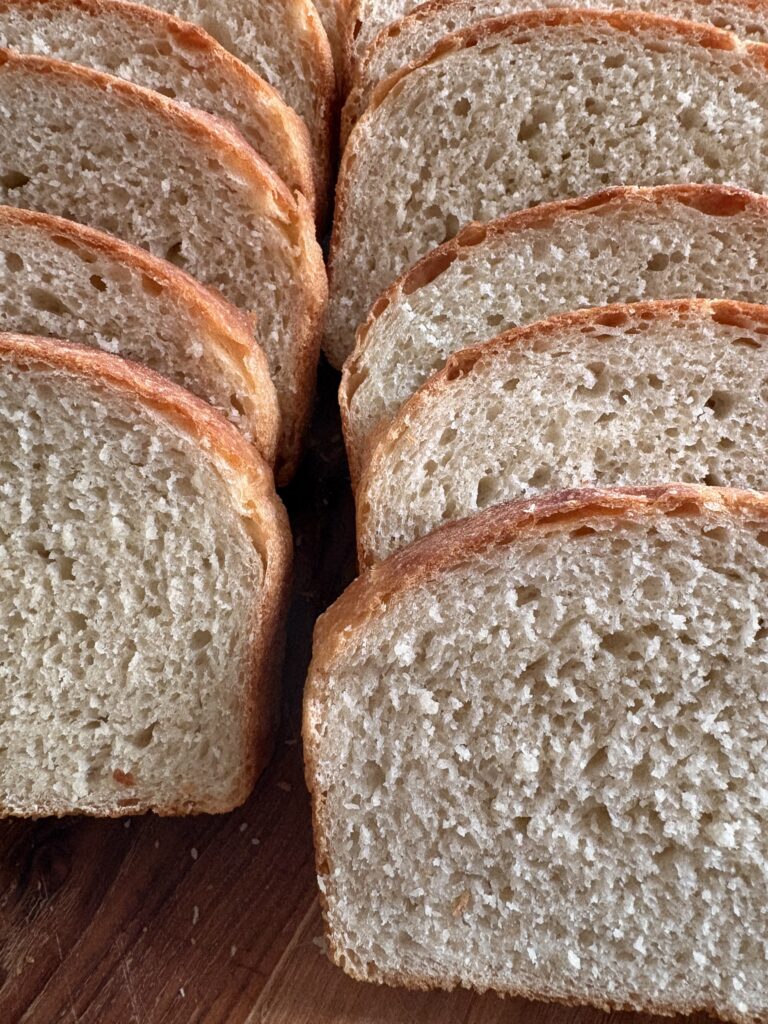
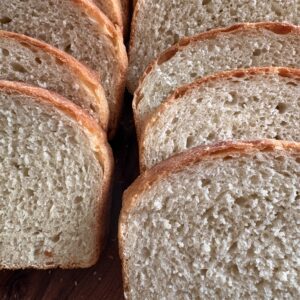
This simple, no-knead Everyday Sandwich Bread is soft, tender, slices easily and freezes beautifully.

Everyday Sandwich Bread. - harvestandnourish.com

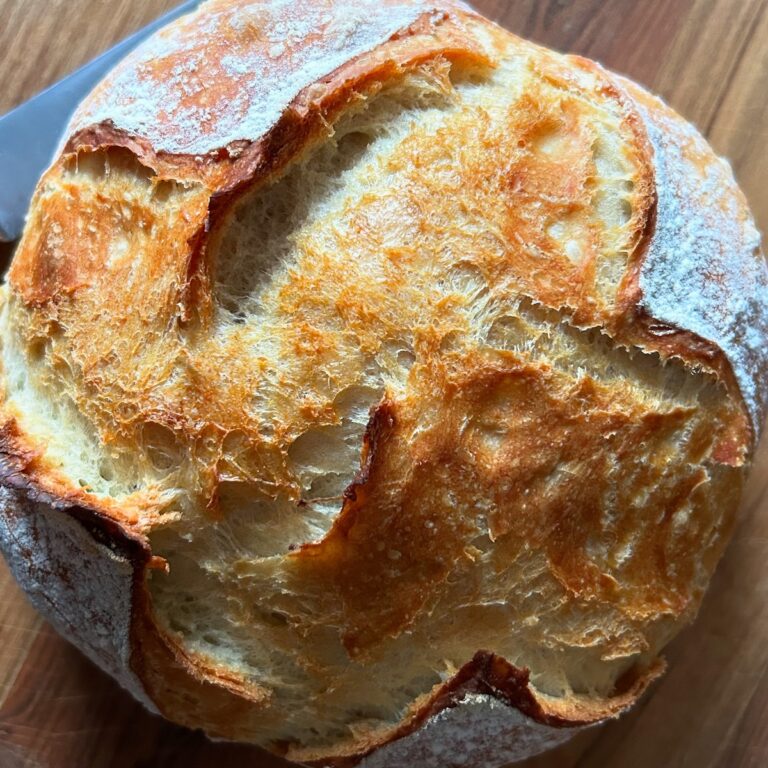
Try this No-Knead Everyday Artisan Bread or this No-Knead Honey Oat Bread next.

You can find more tips and guidance on baking with bread flour, active dry yeast and kosher salt, including substitutions, in the bread guides here.

*This recipe has been revised and updated since first published May 25, 2025.

If you make this recipe, please tag me on Pinterest or Instagram so I can see! 

And of course, feel free to leave any questions, comments or reviews. This is the best place to reach me, and I’d love to hear from you!

Everyday Sandwich Bread. - harvestandnourish.com

Everyday Sandwich Bread

This Everyday Sandwich Bread is soft, tender and perfect for slicing. A simple no-knead, pantry staple recipe, it requires just 15 minutes of hands-on prep time.
Print Save Saved Recipe!
Prep Time:15 minutes mins
Cook Time:45 minutes mins
Rest time::3 hours hrs 30 minutes mins
Total Time:4 hours hrs 30 minutes mins
Keyword: baking, bread, sandwich bread, yeast bread
Servings: 1 9×5-inch loaf
Author: Kerry

Equipment

  • Digital scale
  • Spatula
  • Dough scraper
  • 4 Qt mixing bowl
  • Bread loaf pan
  • Wire cooling rack

Ingredients

  • 180 grams water, room temperature
  • 180 grams milk of your choice, room temperature
  • 1 tbsp honey
  • 2 or 8 grams active dry yeast *amount will vary based on whether you want to do an overnight or same day rise—see notes
  • 460 grams unbleached bread flour
  • 9 grams kosher or fine sea salt
  • Olive oil for drizzling
  • Butter for coating the pan
US Customary – Metric
Prevent your screen from going dark

Instructions

  • In a large mixing bowl, whisk together milk, water and honey (if using) then sprinkle active dry yeast across the top. Let sit for 10-12 minutes.
  • Add flour and salt and mix. Cover the bowl and set aside for 30 minutes.
  • Now we’re going to stretch and fold the dough. Using a wet hand, lift one side of the dough and fold it over and press it into the centre. Turn the bowl 45 degrees and lift from another side and fold again. Keep doing this until the dough starts to hold together, transforming from a shaggy, sticky dough into a smooth dough ball, wetting your fingers to prevent sticking as needed. 
  • Cover the bowl and let the dough rise at room temperature for 2 to 3 hours until it has doubled in volume. Note that the time may vary based on room temperature and environment.
  • Butter a loaf pan. Using a floured hand or dough scraper, pull the dough out onto a lightly floured surface. Again, the dough will be sticky with lots of bubbly fermentation activity. It will stick to your hands and to the sides of the bowl until you turn it out onto a floured surface and start shaping it. That’s good!
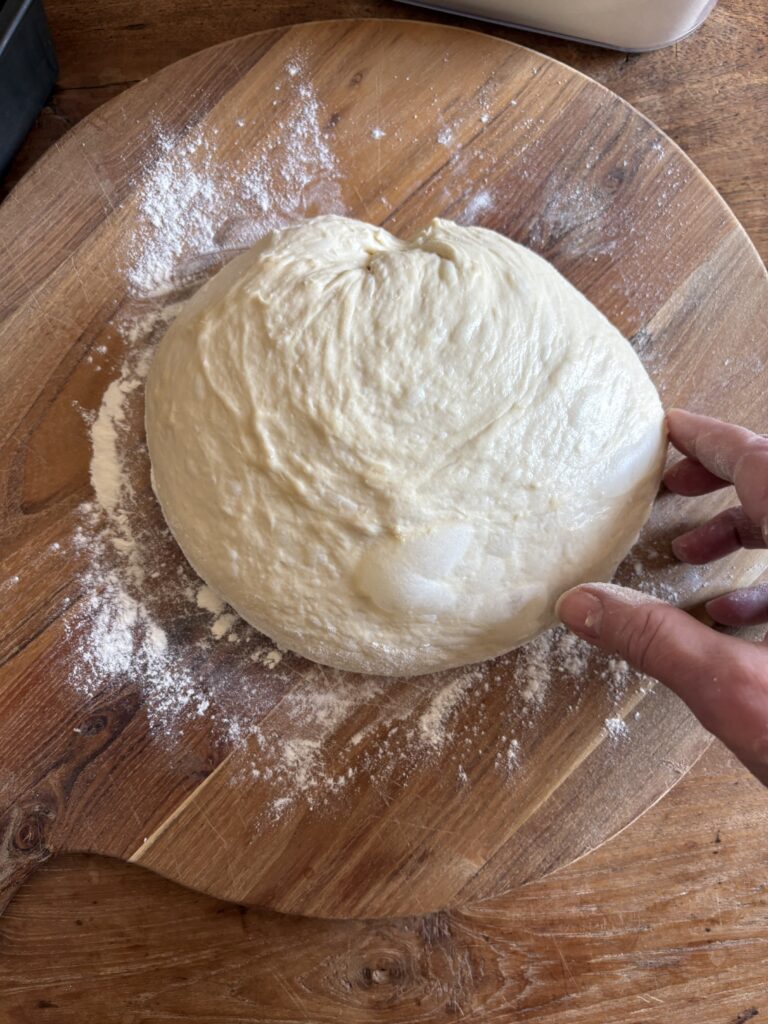
  • Flour your hands and/or dough scraper again and shape the dough into a loaf. Next, take one end and lift and fold 1/3 of the dough into the centre as if you were folding a letter. Repeat with the other end, then turn and place the loaf seam side down in the buttered loaf pan. If needed, lift each end from the middle and gently stretch it into the corners so the dough fills the pan. Drizzle with 1 teaspoon olive oil and rub to coat. Set aside, uncovered, to let rise for 1 hour or until the dough has risen ½ inch above the rim of the loaf pan.
  • Thirty minutes before baking, position a rack to the centre of the oven and preheat the oven to 375ºF (180ºC). Bake for 45 minutes until the top is golden and it sounds hollow when you tap on the top. Turn loaf out onto a wire cooling rack and let cool completely before slicing.
Notes

Measurements: As always, I recommend using a digital scale to measure your ingredients for accuracy. The one I use is highly rated and reasonably priced, and it really is a foolproof way to ensure your ingredient measurements are correct.
Flour: I make all my breads using high-protein bread flours. Other flours may be substituted with varying results, including good quality, gluten-free bread flour blends.
Yeast: I prefer to bake with active dry yeast. If using instant yeast, add it directly to the dry ingredients. If baking overnight, use 2 grams (½ teaspoon) of yeast. To make it same day, use the 6 grams (2 teaspoons) indicated above.
Salt: I prefer to bake with kosher salt. Diamond Crystal Kosher Salt is my go-to and what I use in almost all my recipes. Fine sea salt is a great alternative. It’s important to note that when cooking or baking with salt the quantity you use will vary depending on type and brand. As a general rule, if using Morton’s kosher salt, which has a coarser texture, double it. If using table salt, reduce by half.
Stretch and folds: For this recipe, I’ve added a set of stretch and folds to the method to help strengthen the gluten. The result is a stronger, more airy dough and the loftier rise that comes to mind when we think of traditional sandwich breads.
Rise time: Rest times may vary according to room temperature and environmental conditions. With a little practice, you will find the timing that works best for you.
Hydration: This is an 80% hydration dough. After the first rise, it will be sticky with lots of bubbly fermentation activity. It will stick to your hands and to the sides of the bowl until you turn it out onto a floured surface and start shaping it. That’s good! Rest assured that once you do, it will come together quickly.
Bake it in under 5 hours or let it rise overnight: I tend to prefer the ease and fuller flavour that come with an overnight rise. The night before, I usually start around 8 pm, doing a quick set of stretch and folds around 9 pm and letting it rise overnight. *See note on yeast above if you’d like to do this.
Storage: This bread will keep well sealed on the counter for 3-4 days or in the fridge for up to a week. Sliced bread will freeze well in an airtight container or freezer bag for several months.

Posted In: All Recipes, Bread Recipes

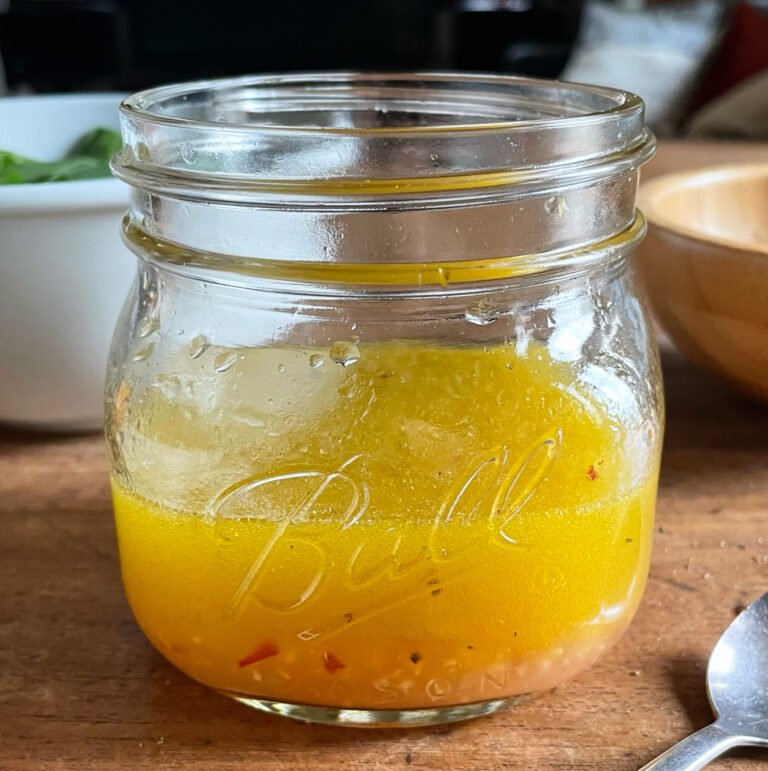
Apple Cider Vinaigrette. - harvestandnourish.comApple Cider Vinaigrette
Strawberry Oatmeal Crisp Bars. - harvestandnourish.comStrawberry Oatmeal Crisp Bars
Creamy Roasted Red Pepper Soup. - harvestandnourish.comCreamy Roasted Red Pepper Soup

Reader Interactions

Leave a Reply Cancel reply

Your email address will not be published. Required fields are marked *

Recipe Rating


Next Post >

Sweet and Smoky Barbecue Sauce

Primary Sidebar

TRENDING RECIPES

About Photo
Hello! I'm Kerry. Recipe developer, bread enthusiast and founder of Harvest & Nourish. I'm so glad you're here 🌻

ON INSTAGRAM

Made with lots of cozy cinnamon and sweetened with Made with lots of cozy cinnamon and sweetened with honey, this no-knead cranberry walnut artisan loaf is hearty, packed with add-ins and so delicious simply toasted with butter.

Full recipe is on my site at harvestandnourish.com or comment “recipe please” and I’d love to send you the direct link!

https://www.harvestandnourish.com/no-knead-cranberry-walnut-artisan-bread

#cranberrywalnut #nokneadbread #activedryyeast #easybreadrecipe
This Tuscan-inspired white bean dip is thick, crea This Tuscan-inspired white bean dip is thick, creamy and herby with bright, lemony undertones. A simple protein-packed appetizer or healthy snack you can have ready in just 15 minutes.

Full recipe is on my site at harvestandnourish.com or comment “recipe please” and I’ll send you the direct link!

https://www.harvestandnourish.com/tuscan-white-bean-dip 

#dip #whitebeandip #highprotein #healthysnacks
While we eagerly await tomato season, this quick h While we eagerly await tomato season, this quick homemade tomato sauce is fresh, so flavourful and comes together in about 30 minutes. Made with canned tomatoes, onion, garlic and lots of fresh basil, it’s my go-to for pizza, quick spaghetti nights, baked pasta dishes or as a base for hearty ragus. You can even use this recipe to make a quick, creamy vodka sauce. 

Full recipe is on my site at harvestandnourish.com or comment “recipe please” and I’d love to send you the direct link! 

https://www.harvestandnourish.com/quick-homemade-tomato-sauce-canned-tomatoes 

#tomatosauce #pastasauce #dinner #dinnerideas #easyrecipes
Easy no-knead small batch ciabatta rolls. Beginner Easy no-knead small batch ciabatta rolls. Beginner friendly, they’re light and fluffy with a thin, crispy crust and an open, airy crumb. The method is simple with everything mixed by hand and calls for an overnight cold proof for added depth of flavour. If pressed for time, I’ve included notes to have them baked up in as little as 4 hours.

Full recipe is on my site at harvestandnourish.com or comment “recipe please” and I’ll send you the direct link!

https://www.harvestandnourish.com/easy-small-batch-ciabatta-rolls

#ciabatta #ciabattarolls #nokneadbread #easybreadrecipe
No-Knead Honey Oat Artisan Bread. A beginner-frien No-Knead Honey Oat Artisan Bread. A beginner-friendly recipe, it’s made using my overnight cold proof method and includes lots of tips and a suggested baking schedule to produce a larger, family-style loaf. 

Full recipe is on my site at harvestandnourish.com or comment “recipe please” and I’ll send you the direct link! 

https://www.harvestandnourish.com/no-knead-honey-oat-artisan-bread

#nokneadbread #honeyoatbread #easybreadrecipe #toast
Sweet and Smoky Barbecue Sauce. Made with pantry s Sweet and Smoky Barbecue Sauce. Made with pantry staple ingredients, it’s sweet and tangy with rich, smoky flavours and ready in minutes. Perfect for summer grilling!

Full recipe is on my site at harvestandnourish.com or comment “recipe please” and I’ll send you the direct link! 

https://harvestandnourish.com/quick-homemade-bbq-sauce-no-ketchup/

#barbecuesauce #bbqsauce #grillingrecipes #grillingseason #homemadebarbecuesauce
  • Privacy Policy & Terms of Use
  • No-Knead Artisan Bread Basics + FAQ’s
  • Contact

Copyright © 2026 Harvest & Nourish · Theme by 17th Avenue