No-Knead Cinnamon Raisin Artisan Bread
Last updated on July 2nd, 2026
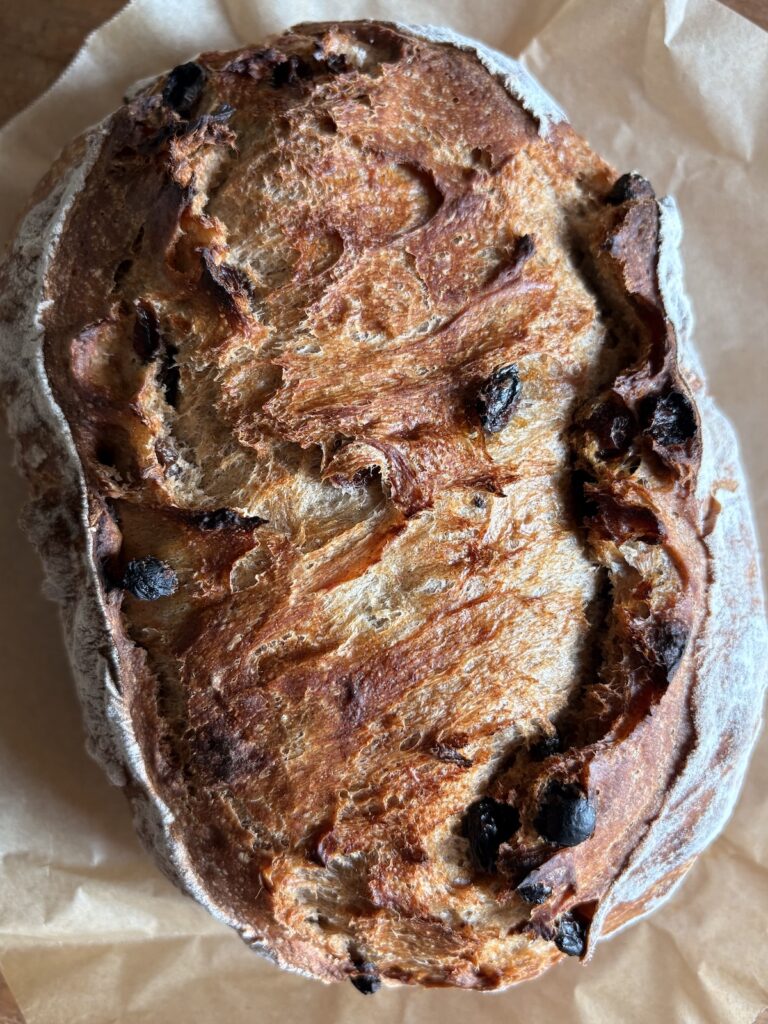
Pop a couple of slices of this No-Knead Cinnamon Raisin Artisan Bread into the toaster and I am instantly transported back in time to childhood family breakfasts. Made with simple, wholesome pantry ingredients, it’s beginner-friendly and requires just 20 minutes of hands-on prep time to make.
My simple no-knead artisan bread recipes are perfect for bakers of all levels, and this hearty, nostalgic breakfast loaf is a reader favourite.
This recipe builds on my 4-ingredient No-Knead Everyday Artisan Bread. Packed with plump, sticky raisins and aromatic cinnamon then lightly sweetened with richly flavoured dark brown sugar, it’s still super easy to make and requires just a handful of extra ingredients.
Here’s everything you’ll need to make it
- 1½ cups water (360 grams), room temperature (at or near 70°F/21°C)
- 1 teaspoon (3 grams) active dry yeast
- 3 cups (390 grams) bread or all-purpose flour, plus more for dusting
- 1 teaspoon (3 grams) kosher or fine sea salt
- ¾ cup raisins (115 grams), stems removed and separated
- 3 tablespoons (37.5 grams) dark brown sugar
- 2 teaspoons (5 grams) ground cinnamon
Ideally, you will also have:
- Digital scale
- Dough scraper
- Parchment paper
- Razor blade or very sharp knife
- Dutch oven such as this one or this one
New to working with yeast? Reference my Baking with Active Dry Yeast guide for answers to common FAQ’s.
You can read more about why you will achieve your best results using a Dutch oven here.
How to make Cinnamon Raisin Artisan Bread in 5 steps
- Mix the dough.
- Cover and let it rise until it has doubled in size.
- Shape your dough and dust with flour.
- Cover and proof the dough in the fridge overnight.
- Turn dough out onto floured surface, reshape if needed, score it and bake.
You can learn more about the benefits of cold proofing no-knead artisan breads in this post Artisan Bread Basics: How Cold Proofing Changes the Game + Answers to FAQ’s.
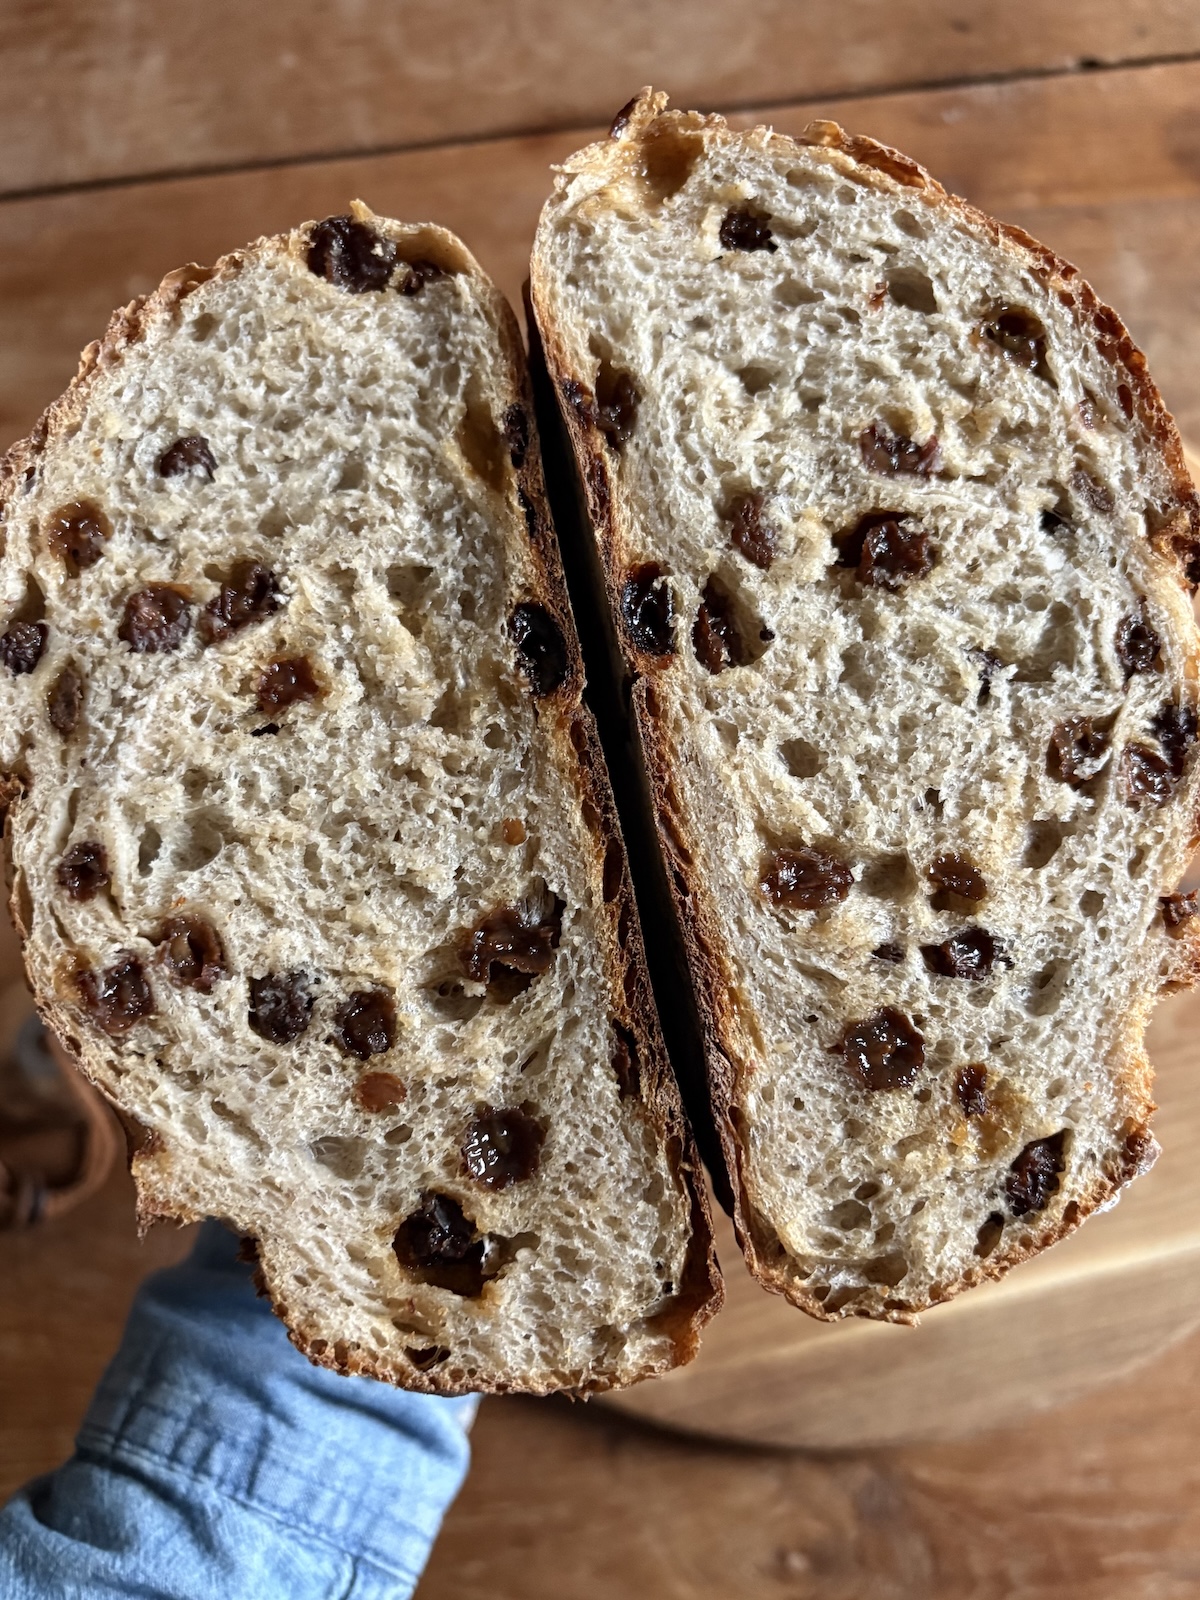
🥖 The secret to perfect slices
To ensure you get sweet pockets of fruit in every single bite, take a minute to pull apart and separate your raisins before adding them to your dry ingredients!
Tossing the separated raisins directly into the flour mixture before adding the water ensures they get lightly coated in flour, preventing them from clumping together or sinking to the bottom of your loaf.
*Do NOT soak the raisins in water. This is a sticky, high-hydration dough and the added moisture will throw off the liquid-to-flour ratio.
Baking schedule
Making this Cinnamon Raisin Artisan Bread is a two-day process where the bread is mixed and prepared on day one, cold proofed in the fridge overnight, then baked on day two.
This is what it looks like:
Saturday morning: Mix dough, cover and let rise.
Saturday afternoon or evening: Shape dough, cover and put it in the fridge.
Sunday morning: Remove dough from the fridge and prepare to bake.
Whether slathered with butter fresh out of the oven or toasted to crispy perfection, this No-Knead Cinnamon Raisin Artisan Bread is an easy win for breakfast or brunch. And it makes the BEST French toast!
Try this beginner-friendly No-Knead Cranberry Walnut Artisan Bread or this Rustic Irish Soda Bread with Cranberries and Raisins next.
For more tips and helpful information, reference my Artisan Bread Basics Series + Answers to Common FAQ’s.
Did you make this recipe?
If you tried this recipe, be sure to rate it and leave a comment below! You can also tag me with your creations on Instagram, save this recipe to your favourite Pinterest boards for later, or connect with our Facebook community if you prefer updates there.
No-Knead Cinnamon Raisin Artisan Bread
Ingredients
- 1½ cups water, room temperature (at or near 70°F/21°C)
- 1 teaspoon active dry yeast
- 3 cups bread or all-purpose flour, plus more for dusting
- 1 teaspoon kosher or fine sea salt
- ¾ cup raisins, stems removed and separated
- 3 tablespoons dark brown sugar
- 2 teaspoons ground cinnamon
Instructions
- Add the yeast to the water and let it sit for 10-15 minutes. In a large bowl, whisk together flour, salt, brown sugar, cinnamon and raisins until the raisins are well-covered in flour. Let sit for 10 minutes.
- Add water and yeast to the bowl and mix just until combined. The dough should look a little sticky and stringy and there should still be a little flour around the edges of the bowl.
- Cover and let rise somewhere warm until it has doubled in size (see note below).
- Once the dough has doubled in volume, use your hands (or a dough scraper if you have one) to pull the dough out onto a floured surface. With floured hands, gently fold the dough into itself several times until a soft, flour-covered ball is formed. Place it into a flour dusted bowl, dust with flour, cover and refrigerate overnight. You can even leave it for as long as 48 hours at this point if you’re not able to bake it right away.
- When you're ready to bake your bread, preheat oven to 450ºF (232ºC) with your Dutch oven inside the oven.
- Once the oven is preheated, turn the dough out onto a lightly floured surface. Depending on how long it's been in the fridge, you may need to repeat the step above using a floured hand or dough scraper to pull the dough out onto the floured surface. If needed, flour your hands once again and fold the dough into itself a couple of more times, gently turning it with your hands and nudging it into the shape of a loaf. Lift and place it on a sheet of parchment paper and score the top with a razor blade or the tip of a sharp knife with a design of your choosing. This will allow steam to escape while it’s baking.
- Remove the Dutch oven from the oven and transfer the dough, still on the parchment, into the Dutch oven. Cover and bake for 30 minutes, then remove the cover and bake for 15-20 minutes more. Your bread will be done once the top is browned, and it sounds hollow when you tap the top.
- Using parchment edges, lift bread from Dutch oven and transfer it to a wire cooling rack to let cool for up to an hour before slicing.


Hi ! your breads look beautiful and I want to try them, especially the cinnamon raisin one. I have one question : do you bake the bread right out of the fridge ? Thank you !
Hi Monique! Yes, that’s right. Please let me know if there’s anything else I can help with!
My husband says this bread is bakery quality, one question though, can I bake this in a loaf pan without a lid as I have a steam assisted oven and if so what temperature and how long to bake for. Once again thank you for posting this recipe.
Hi Chris! So sorry, I’ve never tested that, but I’d love to know if you try it!
Help! I’m confused…..after removing dough from the fridge, the dough is placed into the Dutch oven cold, you don’t wait for it to rise again or come to room temperature before placing in Dutch oven for baking.
The bread looks amazing and I’m definitely making it, just need some clarification.
Thanks!
That is correct Eva, just follow the recipe as directed. Hope you love!
Love! Love! Love! Not only delicious but so easy to make. Making it again tomorrow. THANKS!
Hi Eva! Thanks so much for making this recipe and your feedback, so glad to hear it was enjoyed!
This was hands down the best no-knead bread recipe I have ever tried!! The 2 step long fermentation method is a game changer. The inside crumb is so soft and fluffy, I can’t believe I made this in my own oven! The only small tweak I made was before the bread goes in the refrigerator overnight I shaped the dough into a ball and placed it seam side down on a piece of parchment and then placed both into a 4quart size bowl, covered with plastic wrap. Then in the morning I let the bread warm up a bit, and when the oven and pot are ready all I have to do is slash the top of the bread and place it in the pot. And in 45 minutes I have an absolutely lovely loaf of bread. Perfect 👌🏼
Thank you for a marvelous recipe.
This is holy moly fabulous! I baked it this morning and less than two hours later, it’s half gone. And there are just the two of us. That whole”let the bread cool two hours” doesn’t work well in my house. I did modify it by adding a full cup of golden raisins. I’m going to try dried cranberries and pecans next time. I forgot to poke in any surface raisins so some burned. Would it be better to do that poking before or after cold proofing? I’m kind of feeling like maybe both.
Thank you so much Michele! Hide or remove any that you think might burn after the cold proof. The loaf will continue to rise and open up while baking. You can lift and remove any others with the tip of a sharp knife as soon as the loaf comes out of the oven. They will barely leave a trace. You should try my Cranberry Walnut Artisan loaf next! K
This recipe looks amazing! Is there anyway to make it a sourdough rather than yeast bread?
Hi Dulcy! The consistency of your starter can affect the texture, but you can start by substituting 1/2 cup starter for the yeast then reduce water by 1/4 cup and flour by 1/2 cup to compensate. Give it a try and keep me posted! K
Thank you! I will try that!
Can I make this recipe into two smaller loaves?
Hi Margaret! To divide into two smaller loaves, I recommend reducing bake temp to 425º then bake covered for 20 minutes. Uncover and start checking for doneness after an additional 10 minutes using the tips provided in the notes. Thank you! K
I see you say 3 cups or 390g. Of flour. I thought 120g is one cup thank you
Hi Leslie! High-protein bread flours weigh more than all-purpose flours and the measurements also work for all-purpose flours to make up the difference. Please let me know if there’s anything else I can help with, hope you love the recipe! K
I don’t have a Dutch oven. Can you bake this loaf free form on a baking sheet or will it spread out too much?
Good morning Thea! Baking it covered is key to moisture retention. It’s the steam that’s generated in a Dutch oven that transforms the dough. Heat is distributed more evenly, and the captured humidity is what produces the bakery-style crust. Baking it uncovered without any form of tenting or added moisture will produce a different result than what you see. If you have a 3Q/3L or larger glass covered casserole dish, that would also work. Hope that helps, and please do let me know if there’s anything else I can help with! K
Could you add some cinnamon and sugar to the top of the bread before baking?
Hi Lisa,
So sorry, artisan breads are baked at high temperatures and any added toppings would likely burn. Please let me know if I can help in any other way!
Can you please provide the weight of the flour?
Hi Kasey! It’s all there, just click on the metric conversion link in the recipe card. Hope you enjoy! K
Aloha Kerry,
Thank you for the quick response!! When i did the recipe using a digital scale my dough was VERY moist and sticky. It may be where I live moisture in the air. My question is should it be very sticky/moist. I do LOVE this recipe I have made it on a constant rotation so we can have cinnamon raisin toast every morning. I just want to nail this recipe.
Hi Kasey! Yes, the dough will be very moist and sticky (it will stick to the edges of the bowl) until you turn it out onto a floured surface and start shaping it. To counter the effects of hot, humid air you may need to add a little more flour when shaping your loaf, but it won’t take long for it to hold together well. K
I only have a 6 qt Dutch oven . Can I use that for this recipe? Or double the ingredients?
Hi Debora! You can definitely use it, the 3Q/3L reference is the minimum requirement. Hope you enjoy! K
Amazing recipe! This bread has turned out so delicious. Thank you for sharing.
Thank you so much for the feedback Quincy, I’m glad you enjoyed it! K
Loved this! My kitchen was warm because I was making soup, only needed a 3 hour first rise. This was the easiest bread I’ve made and it was really tasty. Thank you!
Perfect! Thanks so much for sharing Lisa! K
I folded it a few times and placed in proofing bowl back on counter and it keeps rising again and has doubled in size again. I’ll put in refrigerator a few hours before baking it, but do I bake it at this doubled size or fold it and press it back down to original size before baking?
You can fold it one more time, then put it in the fridge for an hour before baking. Hope you love the recipe!
Thank you one more question. I waited 8 hours for the rising time. The I folded the dough a couple of time and shaped it into a ball. After folding a few times, the dough went down to about it’s original size. Is that what it’s supposed to do, or is it supposed to actually stay the “doubled” size?
Yes, that’s right, your loaf will be smaller after folding then rise again in the oven. Happy baking!✨
What do you mean by “seam side up”?
It’s where the edges meet when you fold it!
Why did you change your recipe process? I’ve been making your bread for over a year and noticed you changed it?
Hi Julie! In case you missed it, I updated all my artisan bread recipes earlier this year to include the additional step of a cold proof. I’ve found that it produces a better result and makes handling the dough easier for novice bakers. You can read more in my Everyday Artisan Bread post, which is linked on the homepage. Of course you are welcome to continue making the cinnamon raisin bread the same way you always do! And if you should try the new method, I’d love to hear what you think! Happy baking!✨ K