Ultra-Creamy Spinach and Ricotta Stuffed Shells
Last updated on June 21st, 2026
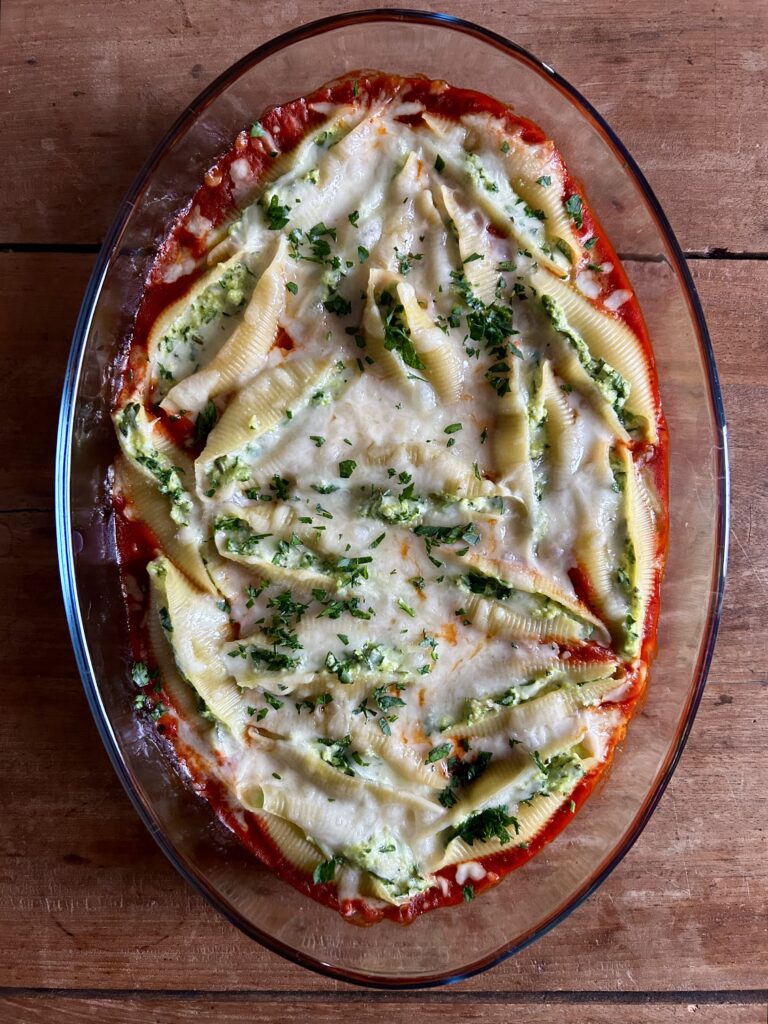
These Ultra-Creamy Spinach and Ricotta Stuffed Shells are fresh and so flavourful. Satisfying and delicious, they’re everything you could want in a cozy vegetarian option for your next pasta night!
A comfort food classic, these saucy stuffed shells are absolutely packed with creamy ricotta, Parmesan and mozzarella, a rich marinara sauce, fresh herbs and leafy greens.
Here’s everything you’ll need to make these Ultra-Creamy Spinach and Ricotta Stuffed Shells
- 1 cup (240 grams) ricotta
- ¾ cup (90 grams) shredded mozzarella
- ½ cup (40 grams) freshly grated Parmesan
- 1 large egg
- 2 cups (60 grams) chopped spinach
- 2 teaspoons (2 grams) finely chopped fresh rosemary
- 1 teaspoon (1 gram) finely chopped fresh sage
- 1/8 teaspoon (<1 gram) nutmeg
- 3 cups (750 ml) quick homemade or store-bought tomato sauce
- 20-24 jumbo pasta shells or conchiglioni
- 1 cup (120 grams) shredded mozzarella (optional)
- Fresh parsley to garnish
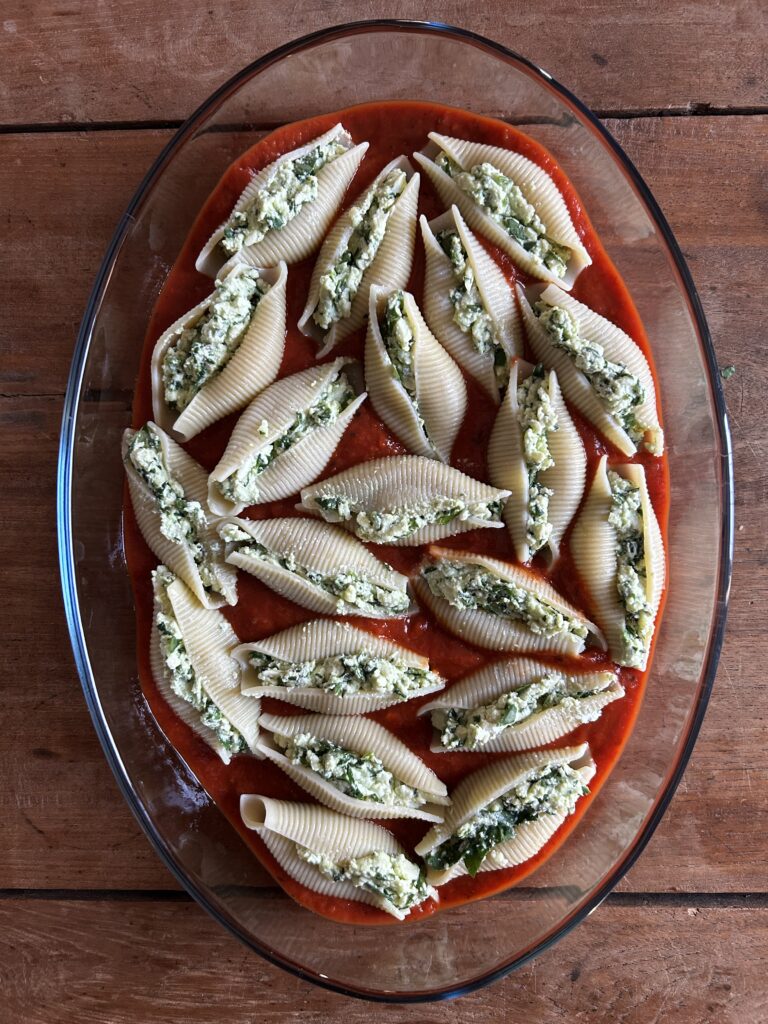
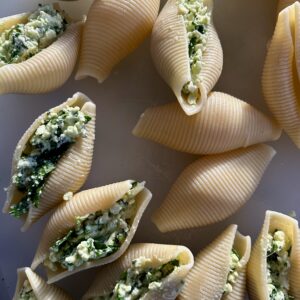
Made with loads of spinach, aromatic garlic, fresh rosemary and sage, this is a quick and easy-to-put-together meal you can feel good about. Simply assemble the filling while cooking the pasta according to package instructions. Drain the pasta then spoon the filling into the shells. Transfer them to the baking dish, top with more mozzarella and bake!

Do I need to cook the spinach?
Not at all, the spinach will have plenty of time to cook while the shells are baking.
Can I make these stuffed shells with frozen spinach?
Yes. First thaw it, then wrap it in a dry tea towel or paper towels and press to remove any excess water before adding it to the filling.
My favorite cooking tip
Boost plant protein by adding 1/3 cup chopped walnuts to the filling!
A Great Make-Ahead Option
To prepare this meal in advance, assemble your pan and cover tightly with plastic wrap to keep the pasta nice and moist in the refrigerator for up to 3 days. Try dividing this recipe between two pans and freeze one once baked for future dinners!
Oh, and even better? The filling is no-cook and both the filling and tomato sauce can be prepared in advance, making these Spinach and Ricotta Stuffed Shells a quick, hearty and comforting meal to put together for an easy weekend dinner.
Try these Turkey Stuffed Roasted Peppers or these Baked Rosemary Chicken Meatballs next.
Did you make this recipe?
If you tried this recipe, be sure to rate it and leave a comment below! You can also tag me with your creations on Instagram, save this recipe to your favourite Pinterest boards for later, or connect with our Facebook community if you prefer updates there.
Ultra-Creamy Spinach and Ricotta Stuffed Shells
Ingredients
Filling
- 1 cup ricotta
- ¾ cup shredded mozzarella
- ½ cup freshly grated Parmesan
- 1 large egg
- 2 cups chopped spinach
- 2 teaspoons finely chopped fresh rosemary
- 1 teaspoon finely chopped fresh sage
- 1/8 tsp nutmeg
Pasta
- 3 cups quick homemade or store-bought tomato sauce
- 20-24 jumbo pasta shells or conchiglioni
- 1 cup shredded mozzarella
- Fresh parsley to garnish
Instructions
- In a medium-sized mixing bowl, stir together all filling ingredients until combined and set aside.
- Cook shells according to package instructions. Drain, then spread them out on a baking sheet or cutting board to prevent them from sticking together.
- Preheat oven to 350°F (177ºC) and spread marinara across the bottom of a 9×13-inch baking pan. Stuff shells with equal amounts filling and place each filled shell into the pan on top of the sauce as you go.
- Sprinkle remaining mozzarella across the top, if using, and bake for 30 minutes. Optional: Once baked, place shells under broiler for 2 minutes keeping a close eye until the cheese is slightly browned and crispy. Garnish with fresh parsley, transfer to serving plates and enjoy!