Jalapeño Cheddar Artisan Bread. - harvestandnourish.com

Welcome to H&N!
  • All Recipes
  • Newsletter
  • Contact
  • Home
  • Bread Recipes
    • Artisan Bread Basics + FAQ’s
  • All Recipes
    • Bread Recipes
    • Breakfast
    • Dessert and Sweet
    • Dips, Jams and Spreads
    • Sauces and Dressings
    • Soups and Salads
    • Snacks and Sides
    • Mains
    • Pizza
  • newsletter
  • Shop
  • Start Here
  • About
  • Nav Social Icons

  • Skip to primary navigation
  • Skip to main content
  • Skip to primary sidebar

Harvest & Nourish

Simple, scratch-made recipes and artisan breads.

All Recipes, Bread Recipes · March 7, 2026

Artisan Bread Basics: Why is My Dough So Sticky? + Common Mistakes + Answers to FAQ’s

This post may contain affiliate links, please see our privacy policy for details.

This post is part of my ongoing Artisan Bread Basics series. In each instalment, I answer reader questions and provide guidance on the core elements of artisan bread making. In the last instalment we covered how cold proofing your dough in the refrigerator after the first rise will vastly improve your loaves. In today’s post, we’ll take another look at high-hydration (sticky) doughs. I’ll go over some common mistakes and best practices, and answer more of your frequently asked questions.

Everyday Artisan Bread. - harvestandnourish.com

The most common question I receive is “Why is my dough so sticky?“

In this post, we’ll cover:

  • Recap: High-hydration doughs
  • Where artisan breads go wrong—common mistakes
  • Troubleshooting over-proofed dough
  • Ways to use over-proofed dough—don’t throw it away!
  • Answers to your frequently asked questions

You can find my Everyday Artisan Bread recipe here.


Working with high-hydration doughs

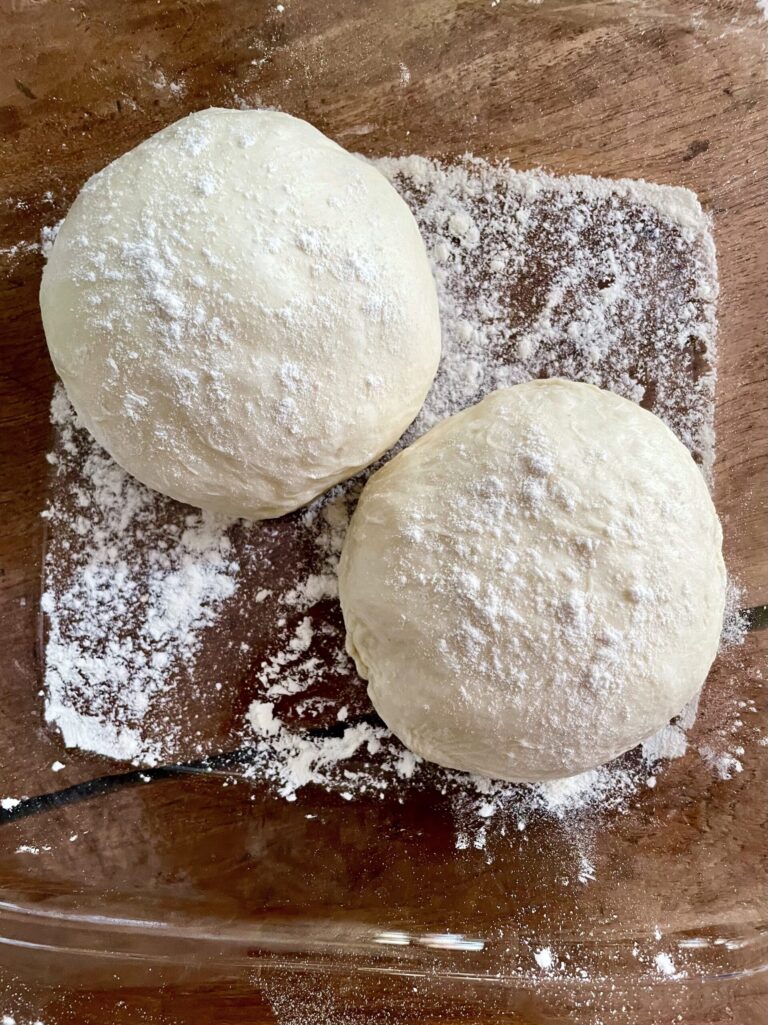
As discussed in this instalment on water, no-knead artisan breads are made with sticky, high-hydration doughs. In their early stages, the dough in my recipes will be well hydrated (90%+) and very sticky. It will stick to your hands and to the edges of the bowl, and it can be tempting to go over the amount of flour indicated in the recipe.

Rest assured, it won’t take long for the dough to hold together well once you turn it out onto a floured surface and start shaping it. 

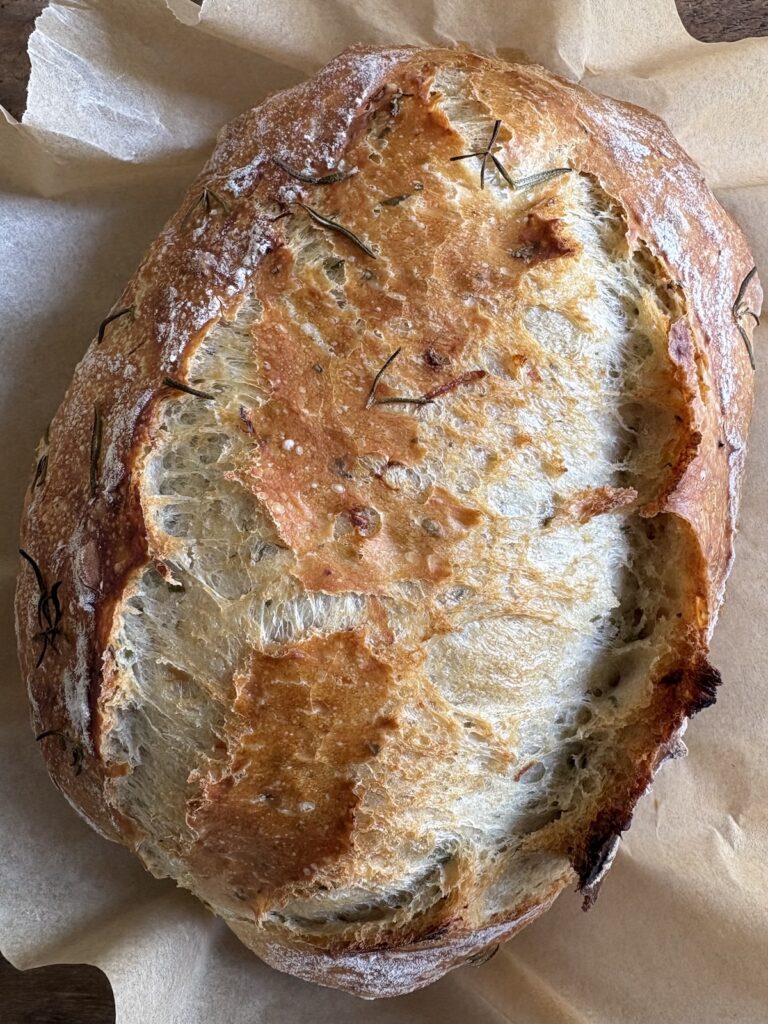
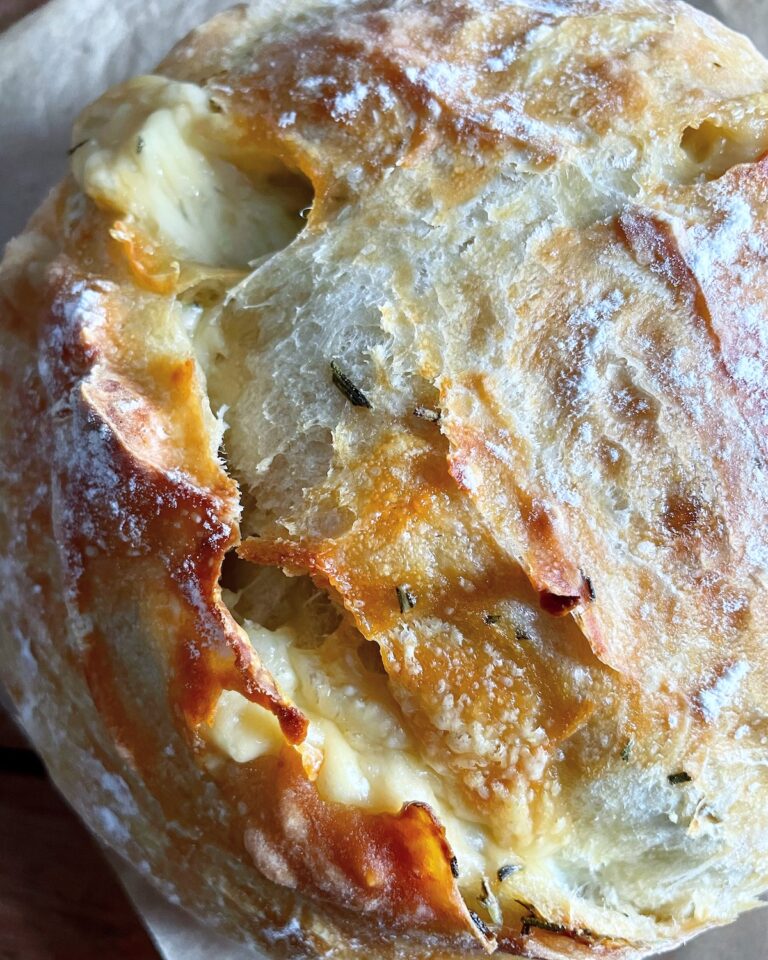
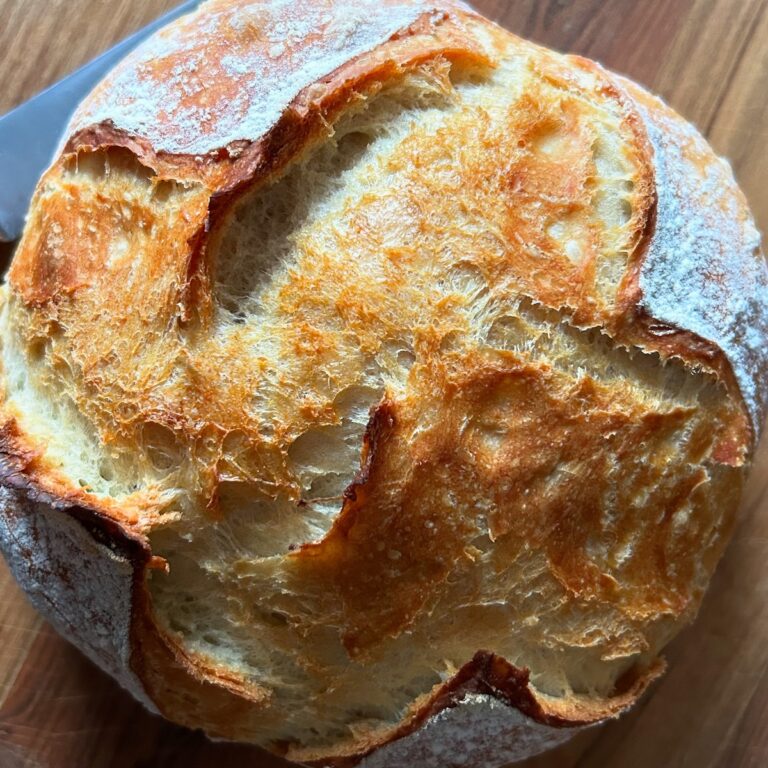
With just a little patience, you will see that sticky doughs and long rise times are essential to getting that airy, structured texture and deliciously rustic, crunchy crust.

You can read more about baking with high-hydration doughs here: Artisan Bread Basics: Water + High-Hydration Doughs + Tips


Where artisan breads go wrong: the 4 common mistakes

  1. Not measuring your ingredients with a digital kitchen scale
  2. Using too much water relative to the flour
  3. Over-fermentation: letting the first rise go too long
  4. Using too much whole wheat, rye or whole grain flours.
Measuring your ingredients with a digital scale

The best way to measure your ingredients, including flour and water, is with a digital kitchen scale using the weight measurements in the recipes. The one I use is highly rated and reasonably priced, and it really is a foolproof way to ensure your ingredient measurements are correct. 

Flour in particular can be tricky. All flours absorb water differently and even your environment (humidity level) can affect water absorption. Whole wheat flour is heavier and absorbs water more quickly than bread flour, which is heavier than all-purpose, for example. That is why you will see slight variations in the metric flour weight measurements in my recipes. Similarly, not measuring your ingredients by weight can also result in under-measuring the flour or over-measuring the water, resulting in a watery mess.

The answer? Experiment! Use the recipe as a guide, always measure ingredients by weight and adjust as you go until you find the formula that works for you.

You can read more about how to use a digital scale and the best alternative here.


Troubleshooting over-proofed dough

Determining your ideal rise time may require a little experimentation. Factors like ambient temperature, humidity level, the type of flour you’re using and even the seasons can all be factors. While we have established that cold proofing will slow down the fermentation process, you may still discover that your dough is over-proofed for a few reasons.

Here are three ways you can adjust your method if your dough is overly sticky, loose or spreads out when baking, depending on your circumstances:

  1. If the dough is overly hydrated, add a bit more flour and a couple of extra folds during shaping to form a stronger, more tightly shaped loaf.
  2. Adjust your schedule. Mix the dough later in the day so it goes into the fridge later and for a shorter period overnight. Alternatively, if the temperature in your home is too warm, try reducing the first rise time, then shape the dough and begin the cold proof earlier.
  3. Temperature settings in refrigerators can vary. Most refrigerators are typically set to maintain an interior temperature between 33°F and 40°F (0°C and 4.4°C). If your fridge runs warm, try turning down the temperature a degree or two if settings allow.

What to do with over-proofed bread dough

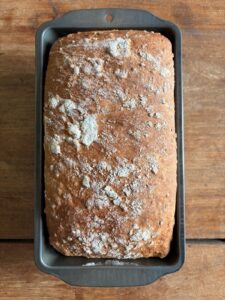
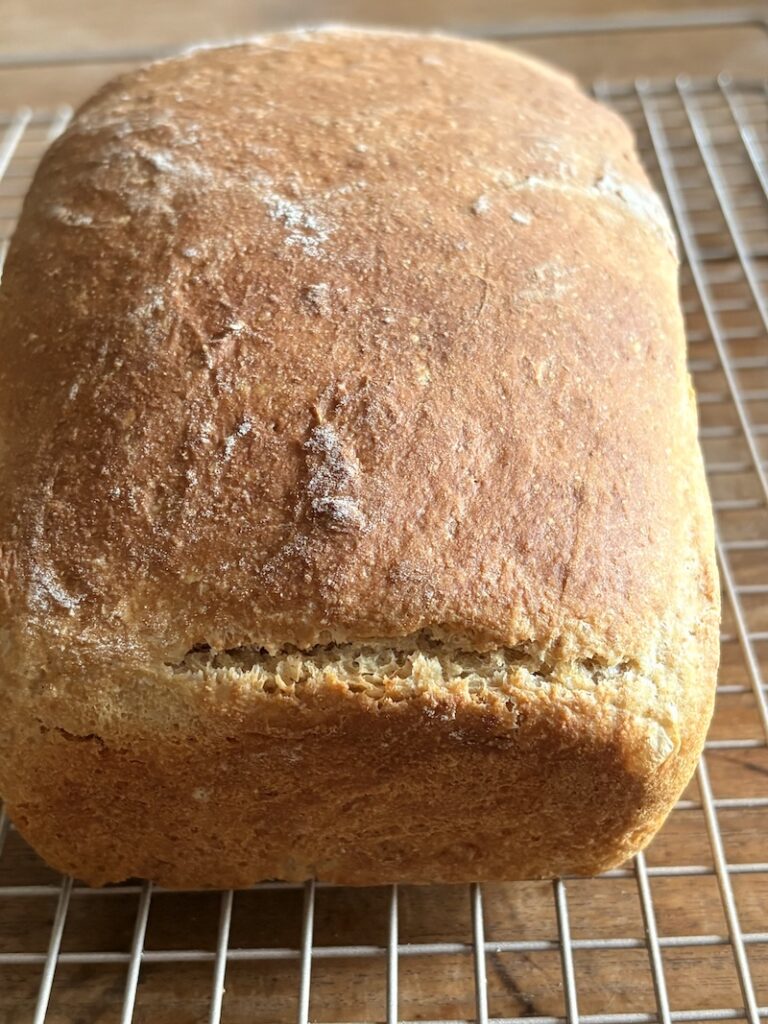
Don’t throw it away! If your dough is over-proofed, you can always change course and bake it in a loaf pan (sandwich bread) or in a cake pan with olive oil (focaccia). The sides of the pan will provide sufficient structure to ensure a good result. 

My favourite thing to do with over-proofed dough? Deflate it and roll it into a ball or two, then store it in an airtight container in the fridge for a future pizza night. 


Baking with alternative flours

There is a lot of interest in incorporating whole grain flour for health reasons.

Whole grain flours make for a denser crumb and cannot be substituted for the bread or all-purpose flour interchangeably without making any further adjustments. 

If you would like to experiment, I always recommend starting with the ingredients called for in the recipe first. This will allow you to become familiar with your environmental conditions and to know your optimal rise time.

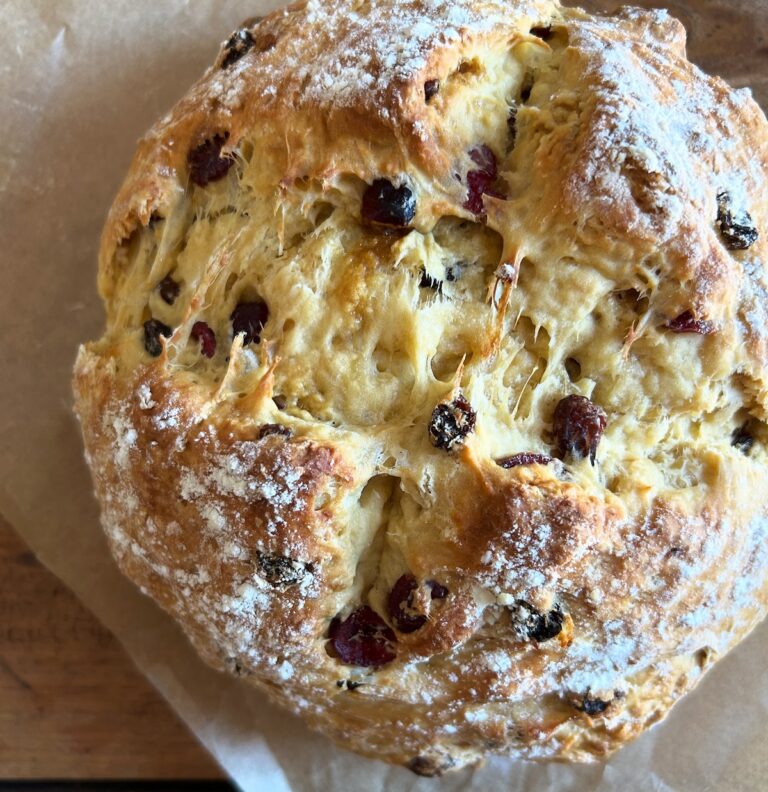
I’ve found that in most instances, you can usually replace up to 30% of the bread flour with whole grain flours and still get a light, airy loaf like the ones you see in the recipe images without any additional changes.  

You will still get some of the added nutritional value that comes with using whole grains, but with the softer texture that comes with good hydration.

You can read more about flour substitutions in the Choosing and Measuring Flour guide here.


Answers to your frequently asked questions

Q. How do I know my dough has risen enough and is ready for cold proofing?

Your dough will have doubled in volume.

Q. How do I know my dough has proofed long enough to be able to bake it?

With proper bulk fermentation and a cold proof, you will already know your dough is ready to bake. A couple of helpful visual cues: you should be able to see some bubble formation just below the surface of a domed (not flat) loaf.

Q. What is an ideal baking schedule to follow?

All my artisan bread recipes include a suggested overnight baking schedule to help you plan. My best tip is to make your refrigerator work for you. If at any point you need to interrupt bulk fermentation (the first rise) put the dough in the fridge and pick up where you left off the next morning.

Q. Why is my bread dense/gummy in the centre, did I use too much water? 

It is highly unlikely that the amount of water called for in the recipe is to blame. 

The most common causes are: 

  • Under fermentation—the yeast is either inactive, or the bread didn’t rise long enough.
  • Over fermentation—the dough has been left too long and the yeast has taken over.
  • Over-handling the dough, which can cause it to deflate. 

You want your dough to be nice and hydrated and to double in volume during the first rise. Then, once you’ve reached your optimal rise time, handle the dough just enough to shape it and let the refrigerator and oven do the rest.


Please feel free to leave any questions or comments. This is the best place to reach me, and I’d love to hear from you!


Posted In: All Recipes, Bread Recipes

Giant Oatmeal Raisin Cookies. - harvestandnourish.comGiant Oatmeal Raisin Cookies
Quick Homemade Tomato Sauce (Canned Tomatoes). - harvestandnourish.comQuick Homemade Tomato Sauce
Pappardelle with Sausage and Peppers. - harvestandnourish.comPappardelle with Sausage and Peppers

Reader Interactions

Leave a Reply Cancel reply

Your email address will not be published. Required fields are marked *

Recipe Rating


Next Post >

No-Knead Honey Oat Bread

Primary Sidebar

About Photo
Hi, I'm Kerry! Cook, gardener, recipe developer and bread enthusiast. Sharing simple, scratch-made recipes and beginner-friendly artisan breads made in my prairie kitchen. I'm so happy you're here! 🌻

Free Recipes & Updates!

POPULAR POSTS

ON INSTAGRAM

This cranberry walnut artisan loaf is a reader fav This cranberry walnut artisan loaf is a reader favourite from Thanksgiving through Easter. Made with lots of cozy cinnamon and sweetened with honey, it’s hearty, packed with add-ins and so delicious simply toasted with butter.

Comment “recipe please” and I’ll send you the link!

https://www.harvestandnourish.com/no-knead-cranberry-walnut-artisan-bread

#artisanbread #cranberrywalnut #noknead #easybreadrecipe #cranberrywalnutbread
Ready in just 4 hours, these Herb and Garlic Skill Ready in just 4 hours, these Herb and Garlic Skillet Rolls are the softest, most flavourful homemade rolls to serve with dinner tonight. Seasoned with fresh rosemary and sage, I highly recommend finishing them with a brush of melted butter and flaky salt. 

Comment “recipe please” and I’ll send you the link!

https://harvestandnourish.com/herb-garlic-skillet-rolls/

#dinnerrolls #skilletrolls #easybreadrecipe #herbandgarlic #homemaderolls
Quick and easy, 5-minute vinaigrette. So light and Quick and easy, 5-minute vinaigrette. So light and flavourful, you’ll never want to buy store-bought dressing again. Double the recipe for easy meals through the week!

Comment “recipe please” and I’ll send it!

https://harvestandnourish.com/easy-vinaigrette-small-batch/

#saladdressing #vinaigrette #easy #smallbatch #housedressing
Baked in 30 minutes, these jalapeño cheddar drop b Baked in 30 minutes, these jalapeño cheddar drop biscuits are a little bit spicy, cheesy and so satisfying. Perfect for meal prepped breakfasts, brunch, lunch or Sunday dinner!

Comment “recipe please” and I’ll send it!

https://harvestandnourish.com/jalapeno-cheddar-drop-biscuits/

#dropbiscuits #cheddarbiscuits #jalapenocheddar #biscuitrecipe #cheddardropbiscuits
This easy, one-bowl lemon blueberry quick bread is This easy, one-bowl lemon blueberry quick bread is made with fresh (or frozen) blueberries and every bit as good as it looks. Perfect for a little weekend snacking.

Comment “recipe please” and I’ll send you the link!

https://www.harvestandnourish.com/lemon-blueberry-quick-bread

#onebowl #lemonblueberry #quickbread #springbaking #blueberrydessert
This Irish soda bread is the cheesiest, fluffiest, This Irish soda bread is the cheesiest, fluffiest, crusty loaf you can have ready in an hour. Baked in a cast iron skillet, it’s a yeast free quick bread that gets its rise from baking soda and buttermilk. And it just might be the easiest bread you will ever make.

Comment “recipe please” and I’ll send you the link!

https://harvestandnourish.com/irish-soda-bread-with-aged-cheddar/

#sodabread #quickbread #easybreadrecipe #stpatricksday #irishsodabread
Baked in just 4 hours, this simple No-Knead Honey Baked in just 4 hours, this simple No-Knead Honey Oat Bread recipe is mostly hands-off and delivers delicious, flavourful results. A hearty, same-day breakfast loaf that’s perfect as is simply toasted with salted butter. New this week! ✨ 

Comment “recipe please” and I’ll send you the link!

https://harvestandnourish.com/no-knead-honey-oat-bread/

#honeyoatbread #homemadebread #honeyoat #noknead #easybreadrecipe
  • Privacy Policy & Terms of Use
  • About
  • Contact

Copyright © 2026 Harvest & Nourish · Theme by 17th Avenue