No-Knead Everyday Sandwich Bread
Last updated on July 6th, 2026
*This recipe has been revised and updated since first published May 25, 2025.
This is just a really great, really easy No-Knead Everyday Sandwich Bread. I’ve always believed that the simplest baking recipes tend to be the best. You don’t need to fuss too much with them, you don’t need any special appliances, and you can rely on the ingredients in your pantry. That’s my baking philosophy.
This is a staple recipe that already feels like it has the makings of a tried-and-true classic.
It started with wanting to develop a recipe for baked egg cups to feed a crowd. The egg cups are still a work in progress, but this No-Knead Everyday Sandwich Bread is ready for its moment in the sun. A simple no-knead, pantry staple recipe, it requires just 15 minutes of hands-on prep time.
Using my Honey Whole Wheat Sandwich Bread as a starting point, I wanted a softer loaf with enough structure to still hold up well for sandwiches (and for baking in a muffin tin), but without the pronounced sweetness typically associated with breakfast loaves.
The result is a soft and airy loaf that tastes just like the bread my aunt made when we were kids—most often served with big chunks of cold butter and a drizzle of honey.
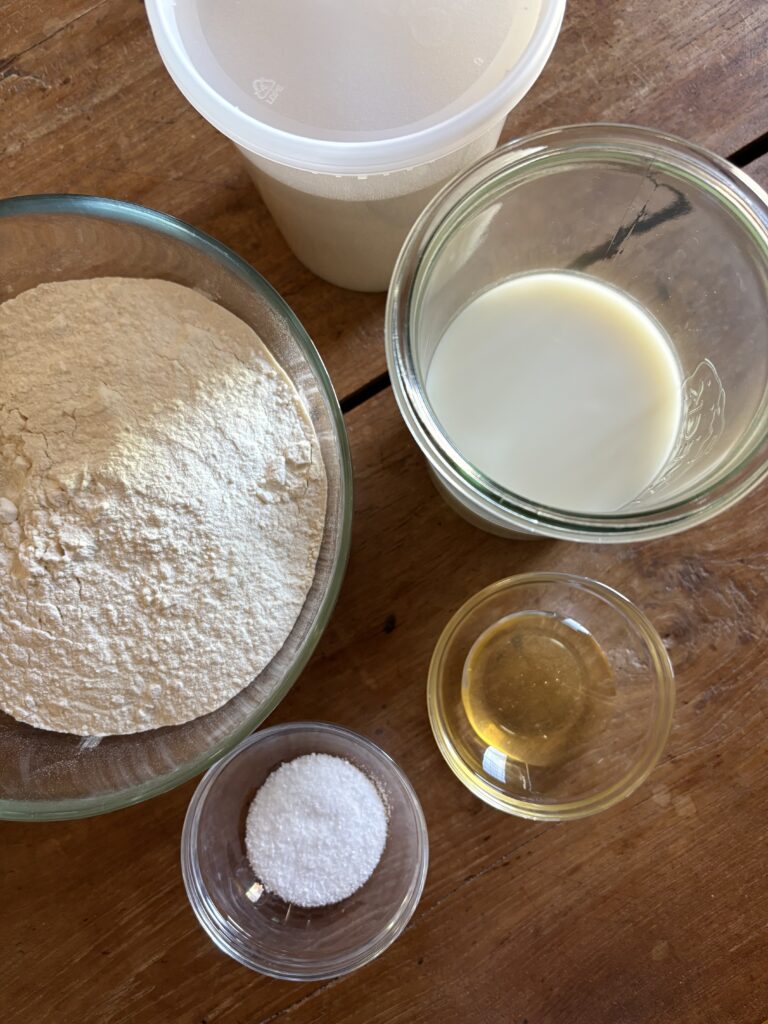
Here’s everything you’ll need to make this No-Knead Everyday Sandwich Bread
- 180 grams (¾ cup) water, room temperature
- 180 grams (¾ cup) milk of your choice, room temperature
- 21 grams (1 tablespoon) honey (optional)
- 6 grams (2 teaspoons) active dry yeast
- 460 grams (about 3½ cups) bread flour
- 9 grams (3 teaspoons) kosher or fine sea salt
- Olive oil for drizzling
- Softened butter for coating the pan
New to working with yeast? Reference my Baking with Active Dry Yeast guide for answers to common FAQ’s.
Why make this No-Knead Everyday Sandwich Bread?
If you’re wondering what makes this loaf so practical and reliable, here are a few standout reasons to add it to your baking rotation:
- One-Bowl, One-Pan Simplicity—This bread recipe is as straight-forward as it gets, making it minimal cleanup, maximum reward.
- Balanced Eating—It’s made with high-protein bread flour and a handful of pantry staple ingredients. Unlike its store-bought counterparts, it contains no additives, preservatives, artificial sweeteners or ingredients you can’t pronounce.
- Minimal hands-on prep time—Most of the work is done during rest time (or when you’re asleep!) and while it bakes.
- Customizable—Use the measurements as a guide and experiment with your favourite flours, dairy-free milks or seasonings.
- Versatility—This simple, no-knead sandwich bread is great for sandwiches of all kinds, grilling, toasting or as a base for other recipes. Also, great for breadcrumbs.

A few helpful tips for making this No-Knead Everyday Sandwich Bread
How to make Everyday Sandwich Bread in 5 steps
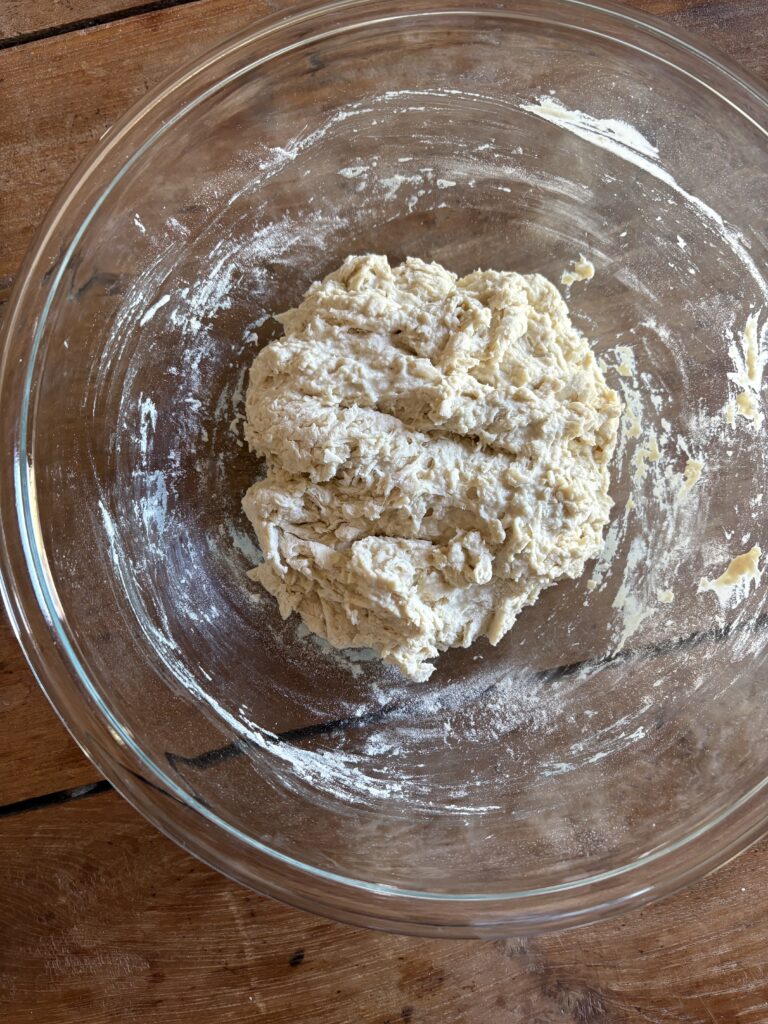
- Mix dough, cover and set aside for 30 minutes.
- Perform a set of stretch and folds, cover and let rise for 2 to 3 hours.
- Shape loaf, transfer to pan and let rise for 1 hour or until it crowns the rim of the pan.
- Bake for 45 minutes.
- Transfer to wire cooling rack and let cool completely before slicing.
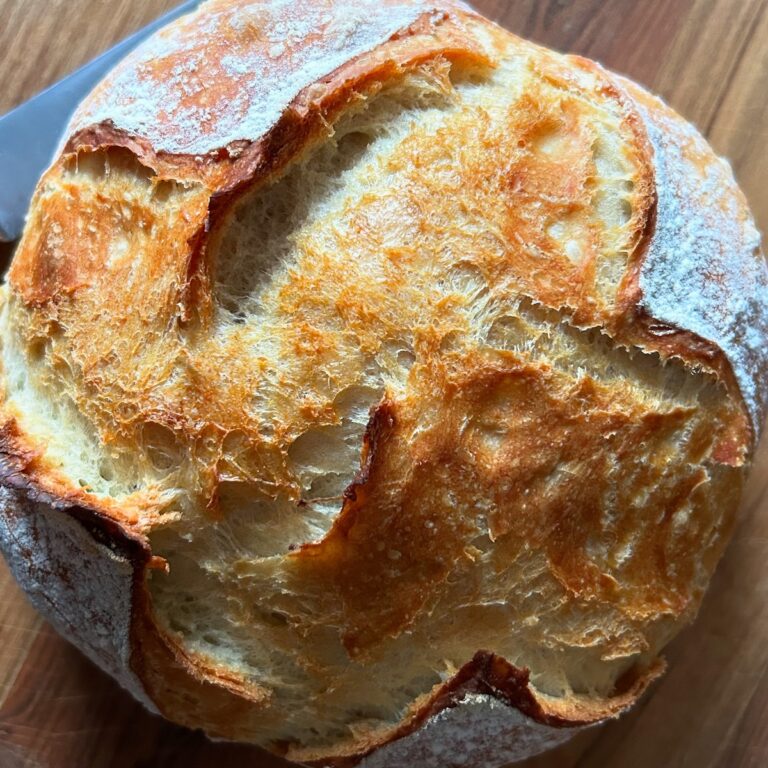
This is what it looks like
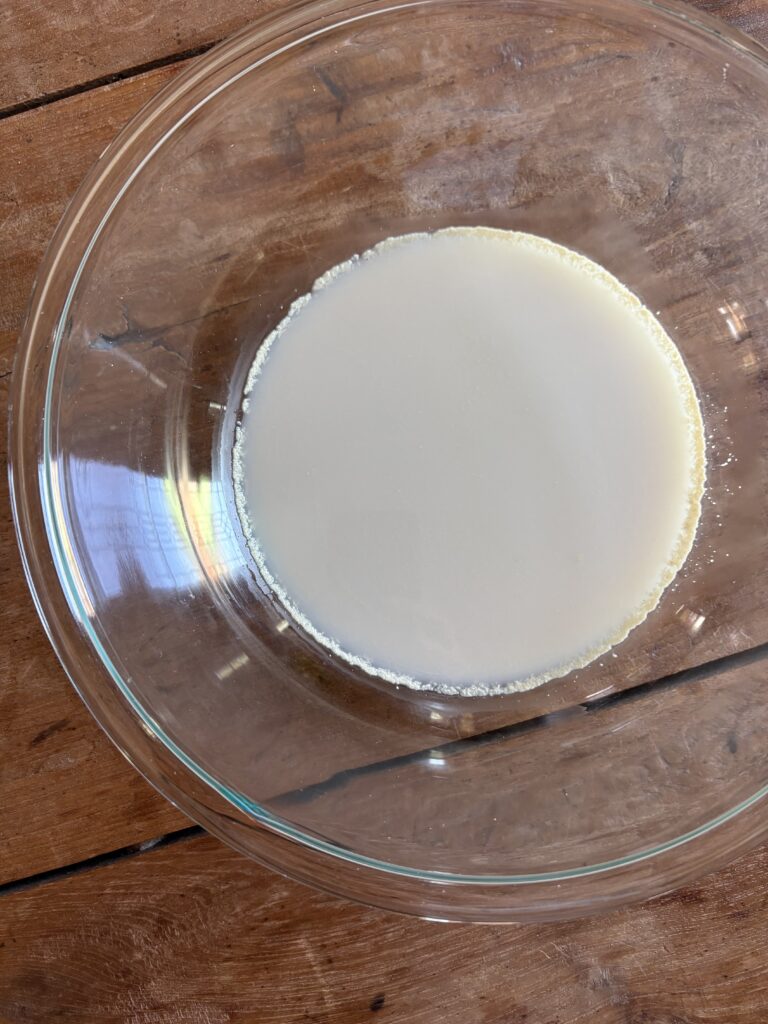
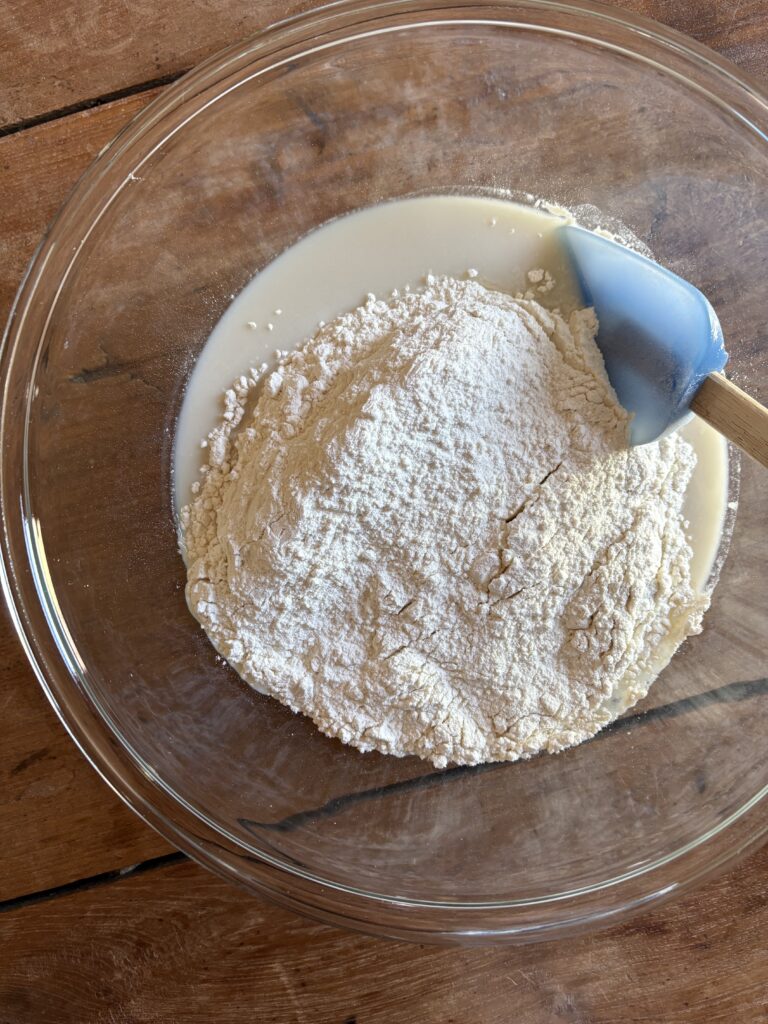
Whisk together milk, water and honey, sprinkle yeast over top and let sit for 10-12 minutes. In a second bowl, whisk together flour and salt and let sit for 10 minutes.
Add flour and salt…
mix again, cover and set aside for 30 minutes.
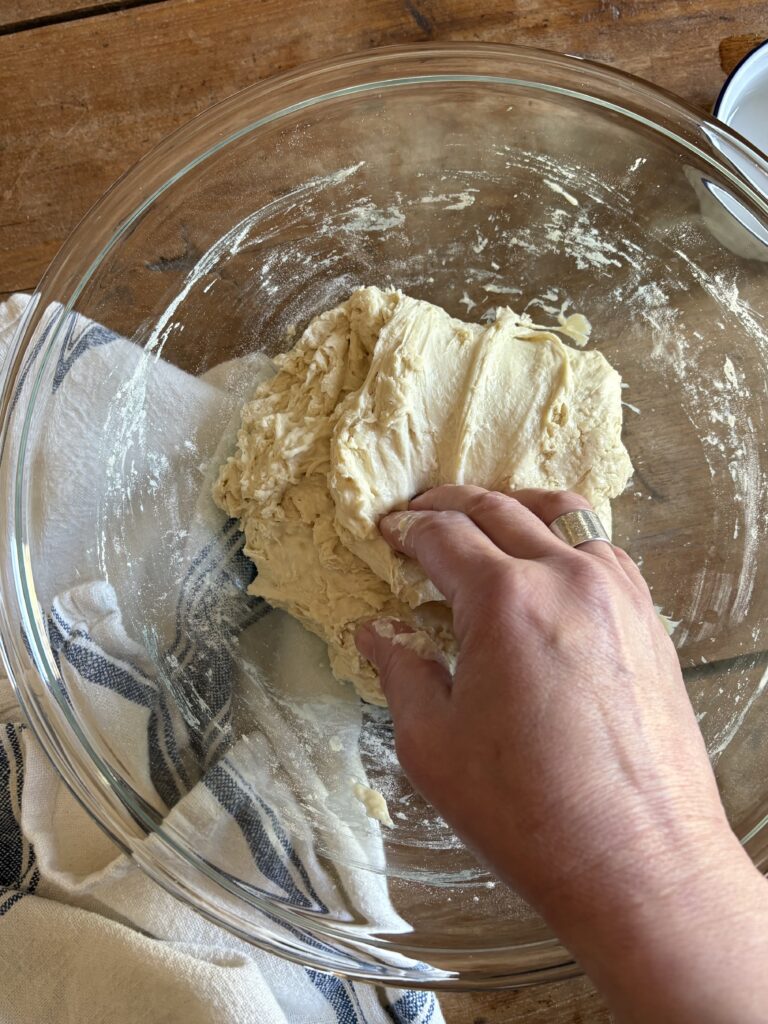
Next, we’ll do the stretch and folds.
Until the dough has been shaped into a ball.
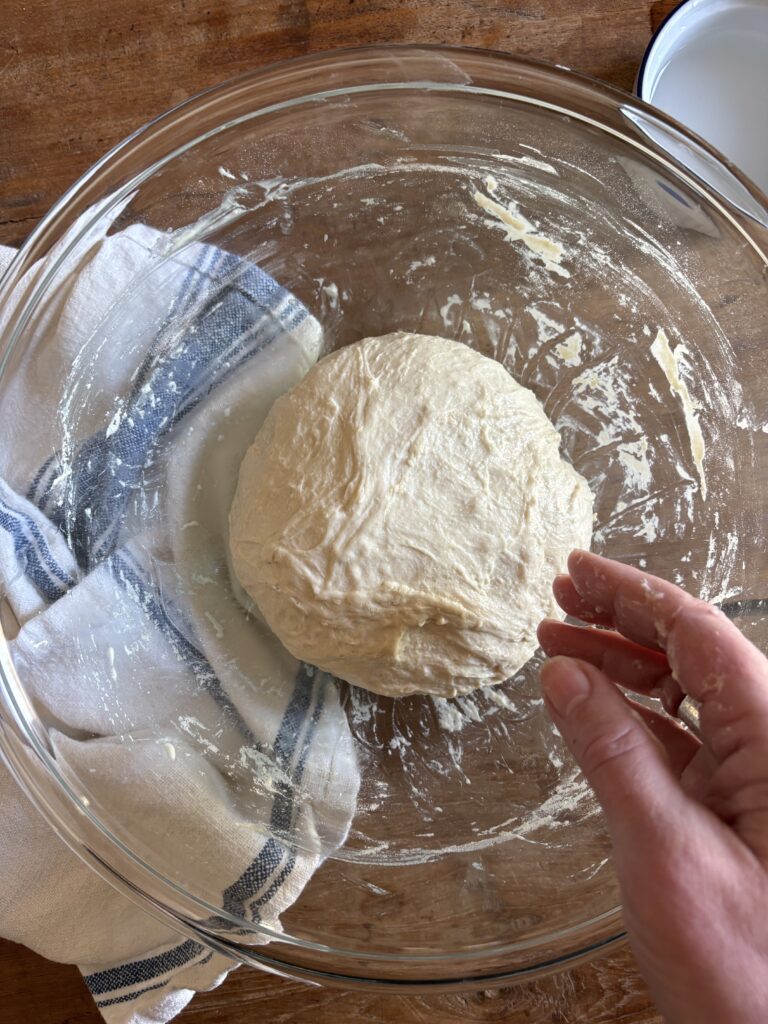
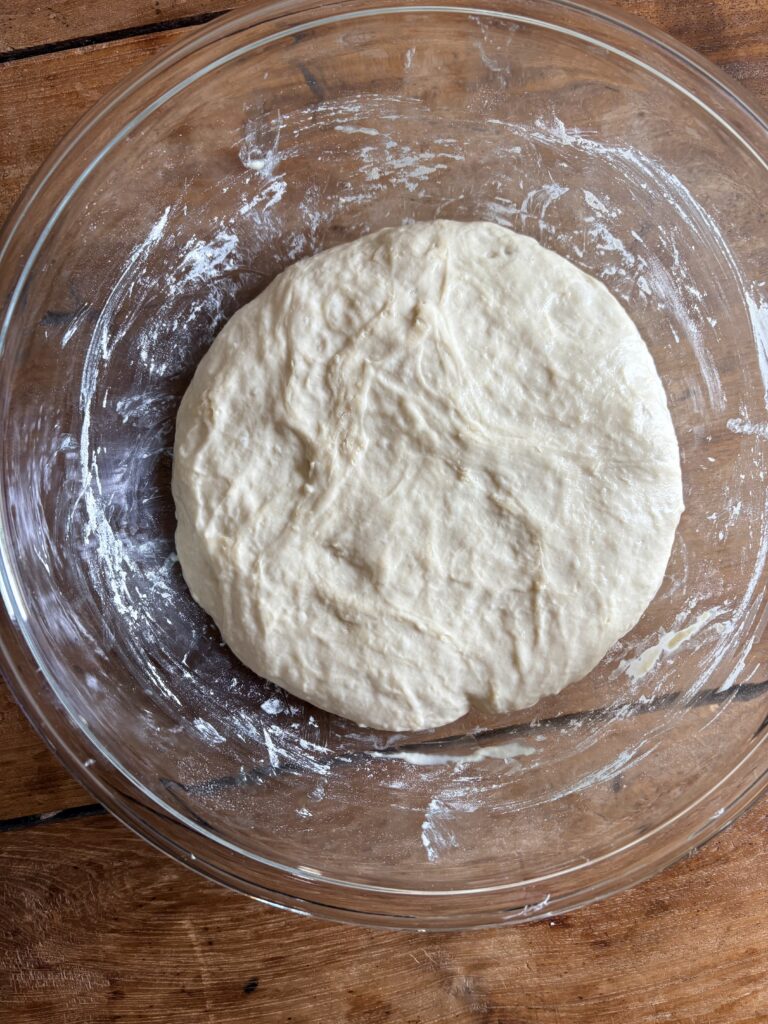
Then cover and let rise until it has doubled in volume, about 2 hours.
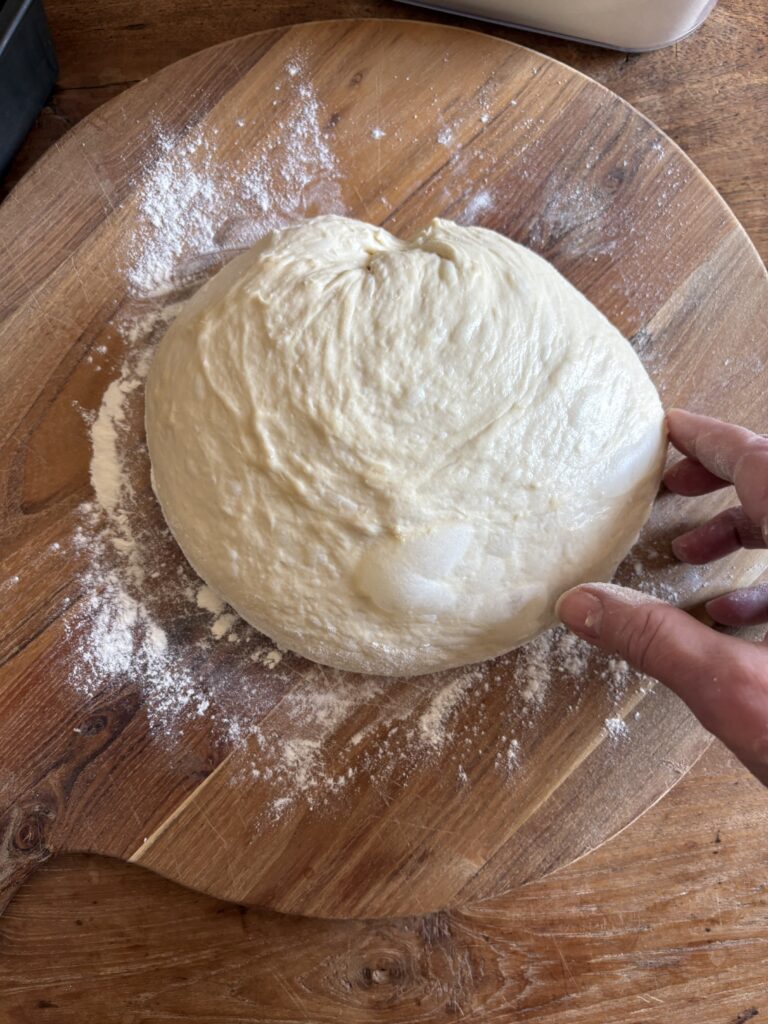
Using either a floured hand or flexible dough scraper, pull the dough out onto a lightly floured surface.
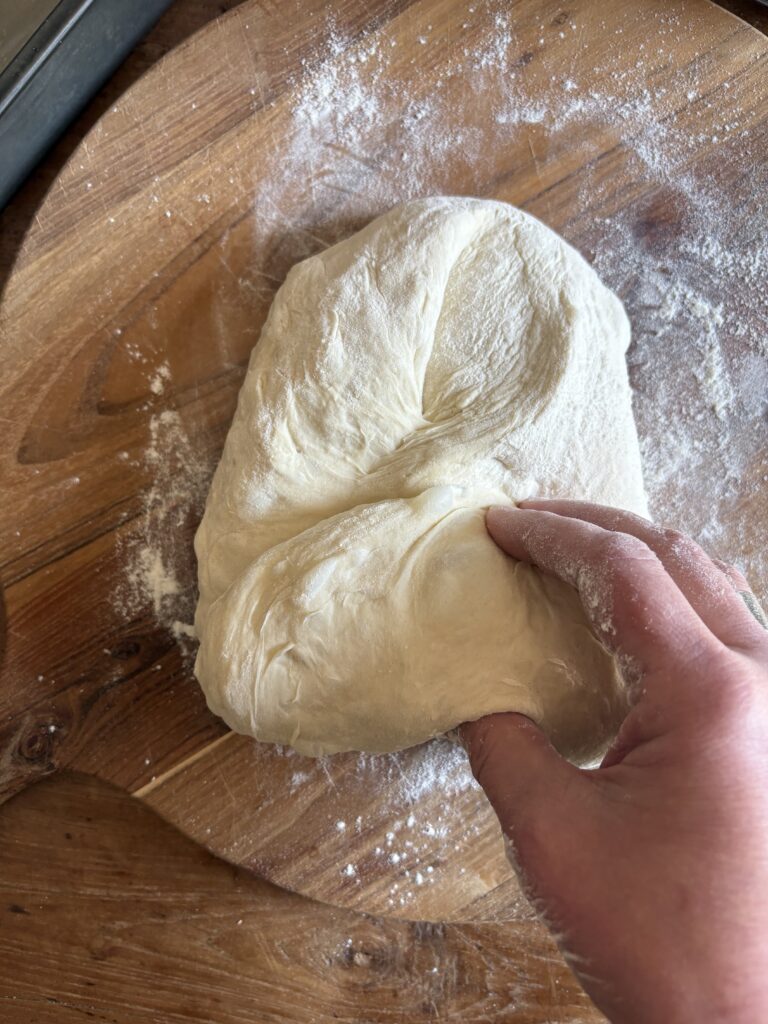
Shape it into a loaf then turn it over and do a letter fold.
Next, turn it seam side down…
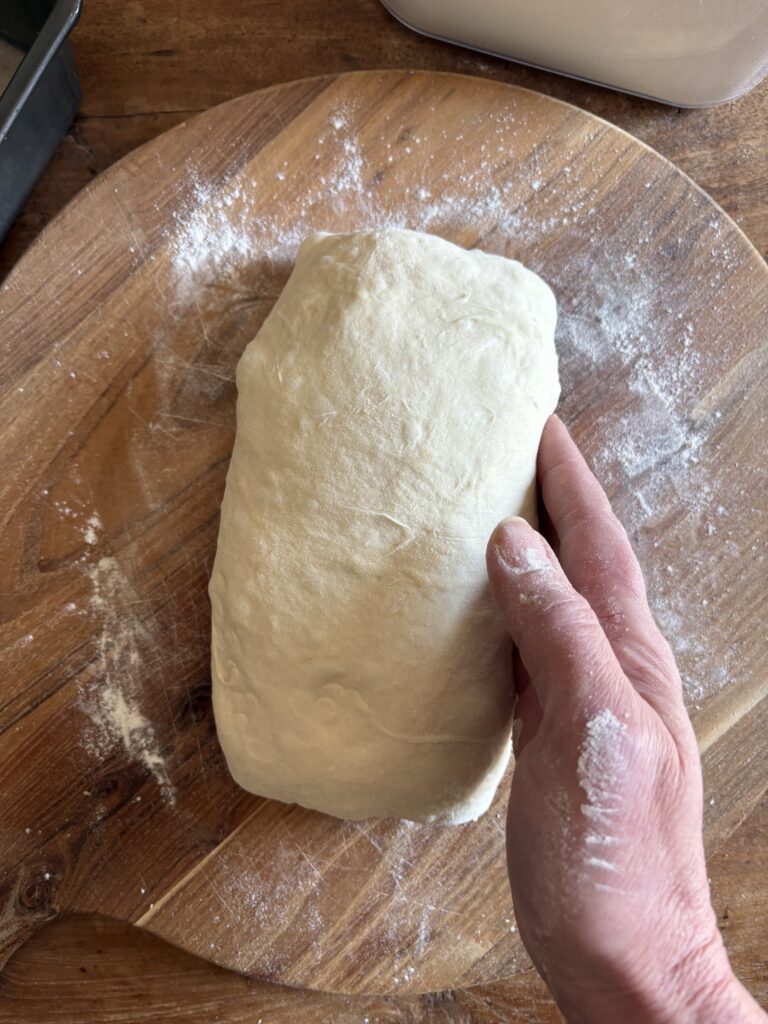
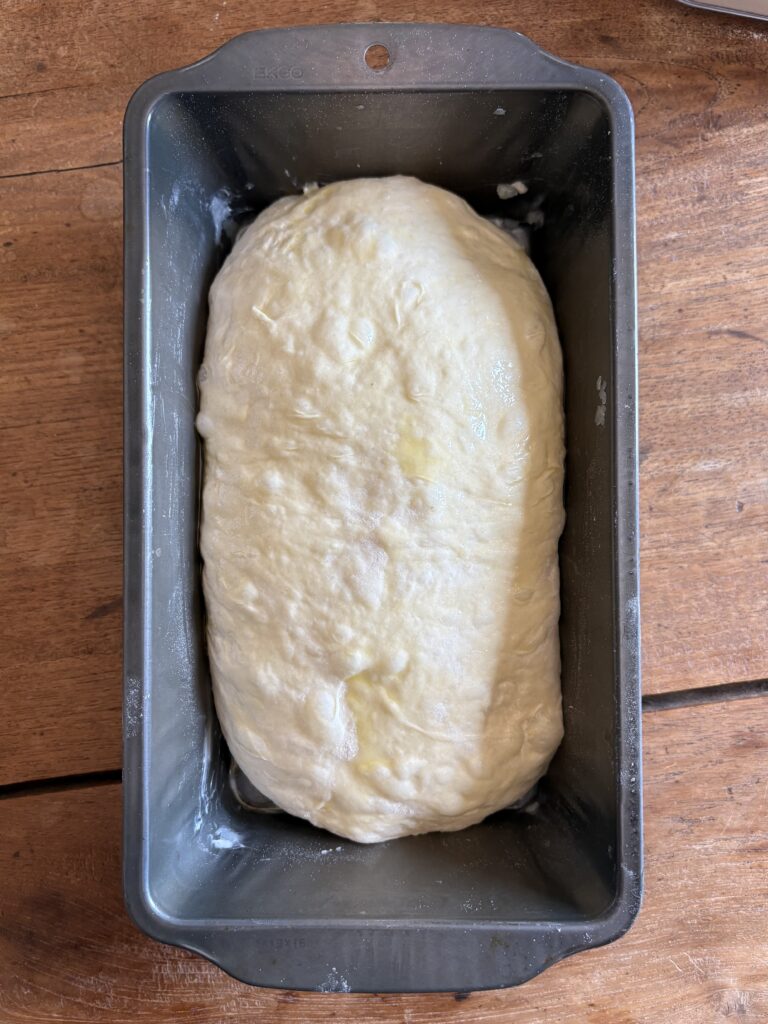
…then transfer it to a buttered loaf pan, rub with olive oil, and let it rise for another hour before baking.
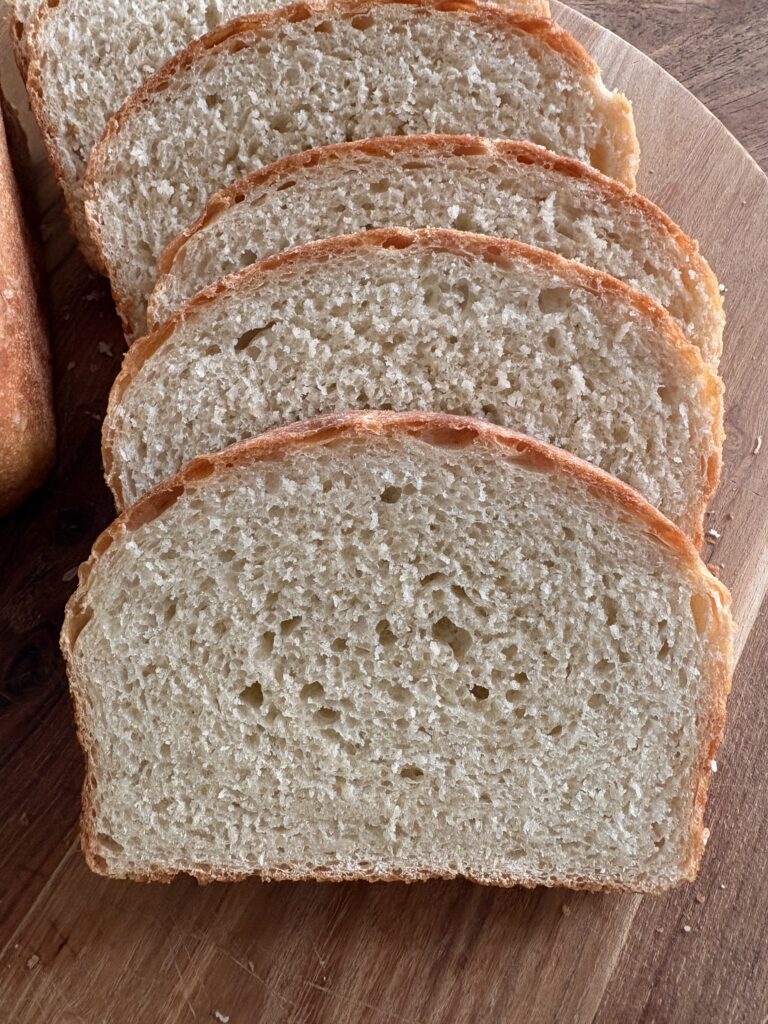
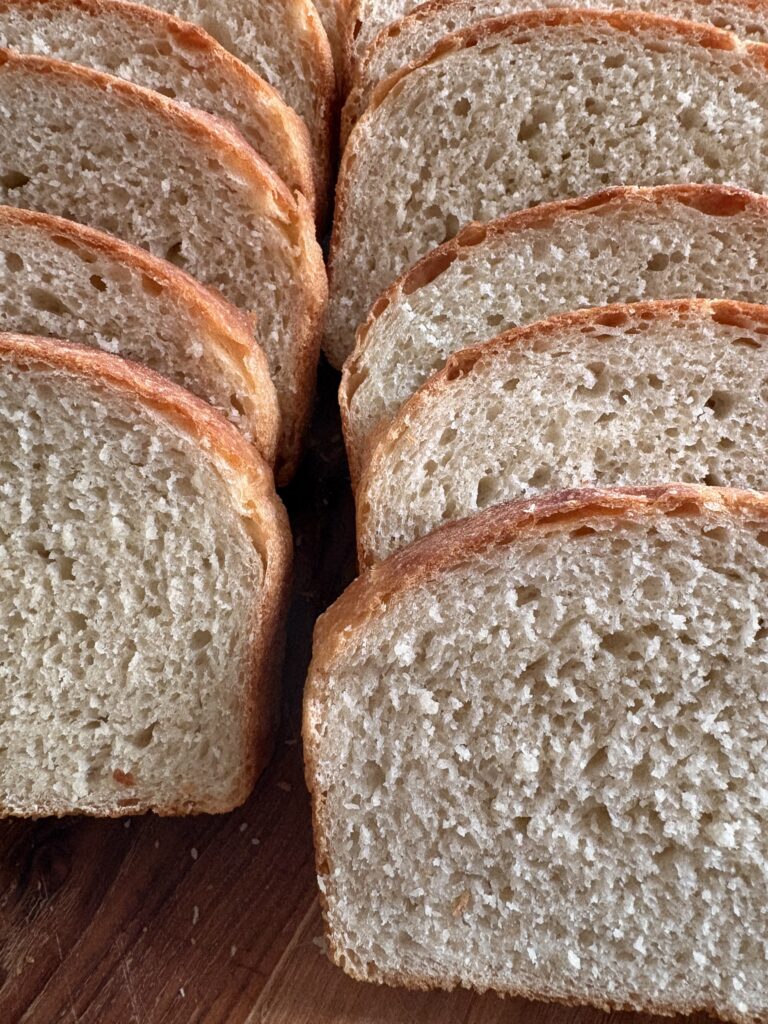
This simple, No-Knead Everyday Sandwich Bread is soft, tender, slices easily and freezes beautifully.
🔪 How to get perfect sandwich slices
There’s nothing better than the smell of fresh bread baking, but never slice your sandwich loaf while it’s still hot from the oven!
Cutting into hot bread releases the trapped steam too fast, which will collapse the tender structure and leave your slices gummy.
Let the loaf cool completely on a wire rack for at least 1 hour (or 2!) before slicing with a sharp serrated knife.
This patience guarantees you get perfectly clean, bakery-thin sandwich slices that hold up beautifully.
Try this No-Knead Everyday Artisan Bread or this No-Knead Honey Oat Bread next.
You can find more tips and guidance on baking with bread flour, active dry yeast and kosher salt, including substitutions, in the bread guides here.
Did you make this recipe?
If you tried this recipe, be sure to rate it and leave a comment below! You can also tag me with your creations on Instagram, save this recipe to your favourite Pinterest boards for later, or connect with our Facebook community if you prefer updates there.
No-Knead Everyday Sandwich Bread
Ingredients
- 180 grams water, room temperature
- 180 grams milk of your choice, room temperature
- 1 tbsp honey
- 2 or 8 grams active dry yeast *amount will vary based on whether you want to do an overnight or same day rise—see notes
- 460 grams unbleached bread flour
- 9 grams kosher or fine sea salt
- Olive oil for drizzling
- Butter for coating the pan
Instructions
- Whisk together milk, water and honey (if using) then sprinkle active dry yeast across the top. Let sit for 10-12 minutes. In a large mixing bowl, whisk together flour and salt and let sit for 10 minutes.
- Add yeast mixture to flour and salt and mix, then cover and set aside for 30 minutes.
- Now we’re going to stretch and fold the dough. Using a wet hand, lift one side of the dough and fold it over and press it into the centre. Turn the bowl 45 degrees and lift from another side and fold again. Keep doing this until the dough starts to hold together, transforming from a shaggy, sticky dough into a smooth dough ball, wetting your fingers to prevent sticking as needed.
- Cover the bowl and let the dough rise at room temperature for 2 to 3 hours until it has doubled in volume. Note that the time may vary based on room temperature and environment.
- Butter a loaf pan. Using a floured hand or dough scraper, pull the dough out onto a lightly floured surface. Again, the dough will be sticky with lots of bubbly fermentation activity. It will stick to your hands and to the sides of the bowl until you turn it out onto a floured surface and start shaping it. That’s good!
- Flour your hands and/or dough scraper again and shape the dough into a loaf. Next, take one end and lift and fold 1/3 of the dough into the centre as if you were folding a letter. Repeat with the other end, then turn and place the loaf seam side down in the buttered loaf pan. If needed, lift each end from the middle and gently stretch it into the corners so the dough fills the pan. Drizzle with 1 teaspoon olive oil and rub to coat. Set aside, uncovered, to let rise for 1 hour or until the dough has risen ½ inch above the rim of the loaf pan.
- Thirty minutes before baking, position a rack to the centre of the oven and preheat the oven to 375ºF (180ºC). Bake for 45 minutes until the top is golden and it sounds hollow when you tap on the top. Turn loaf out onto a wire cooling rack and let cool completely before slicing.